- Published on
I Built Another Mechanical Keyboard
The Belafonte Build
- Authors

I’m starting to build a nice little mechanical keyboard collection. I have a few 60%, a 65%, and a 75%. These are great, and I love each like a child. One thing I did not have was any kind of ergo split or Alice-type layout.
I wanted one.
I have a growing collection of keycaps without a possible home. So it was time to find another keyboard case!
Parts
I kept my eyes open for quite a few months. I kept my eyes open for new group buys, even watching r/mechmarket. Finally, I found an Alice-clone that wouldn’t break my bank account: the Arisu Keyboard, Round 3 by Nico and Steph Studios.
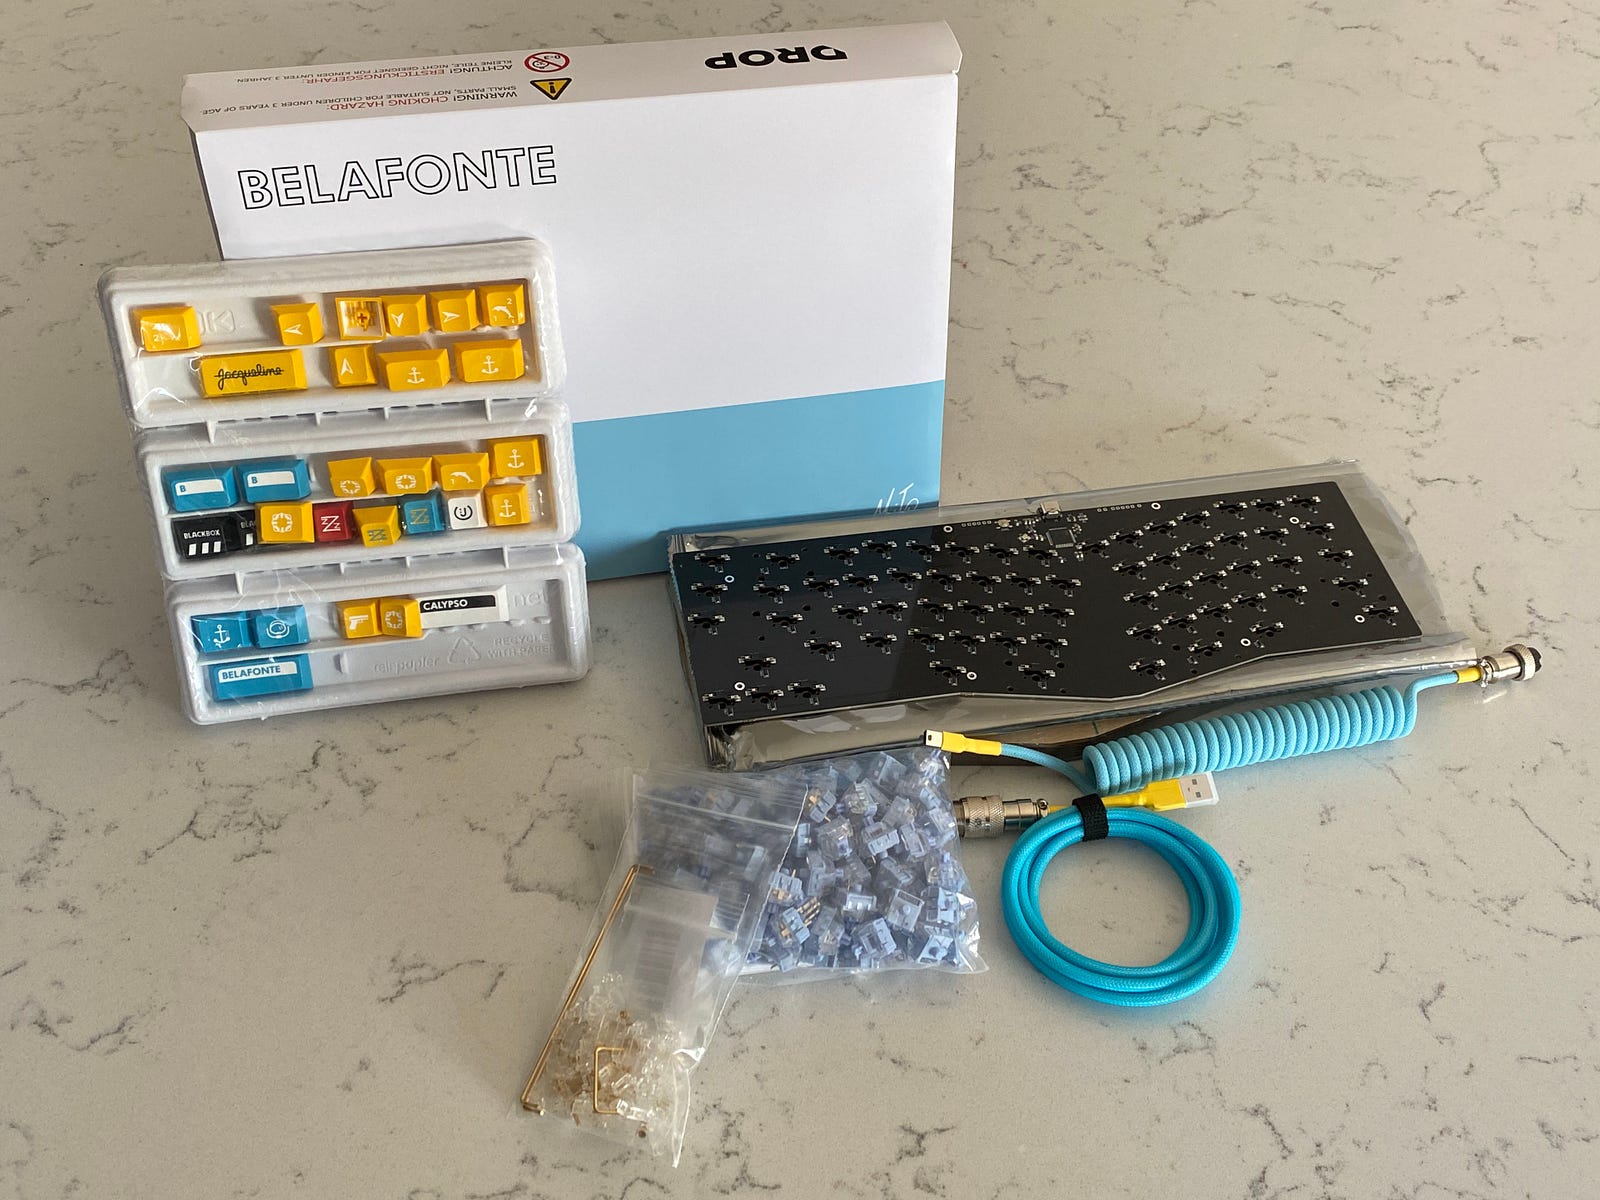 All the parts I used for the build
First, this was an Alice-like ergo layout which was something I was looking for. Second, this was entirely acrylic. Which wasn’t something I had yet.
I’m a Wes Anderson fan, so when Drop introduced the Belafonte keycap set I signed up right away. Also, as part of this offering, Drop was also selling a custom USB cable from Space Cables that matched the Belafonte keycaps.
Fine, take my money 💰 💰.
Here is the entire parts list:
- GMK Belafonte mechanical keyboard keycaps, with Decorations Kit
- Nico and Steph Studios Arisu Keyboard, Round 3 — 7 layer Acrylic case and PCB with Hotswap connectors
- Zeal PC Transparent Gold-Plated Screw-In PCB Stabilizers
- Anubis Switch by Mechs on Deck
- Kailh Polia Tactile Switches
One thing of note: I didn’t actually use the Space Cables cable on this build. USB connectors are hard. When I purchased the Arisu Keyboard, I failed to pay close attention to the USB connector. It wasn’t until I went to test the PCB that I discovered I had the wrong connector. The custom cable I ordered uses a USB Type-B Mini connector while the PCB uses a USB Type-C connector.
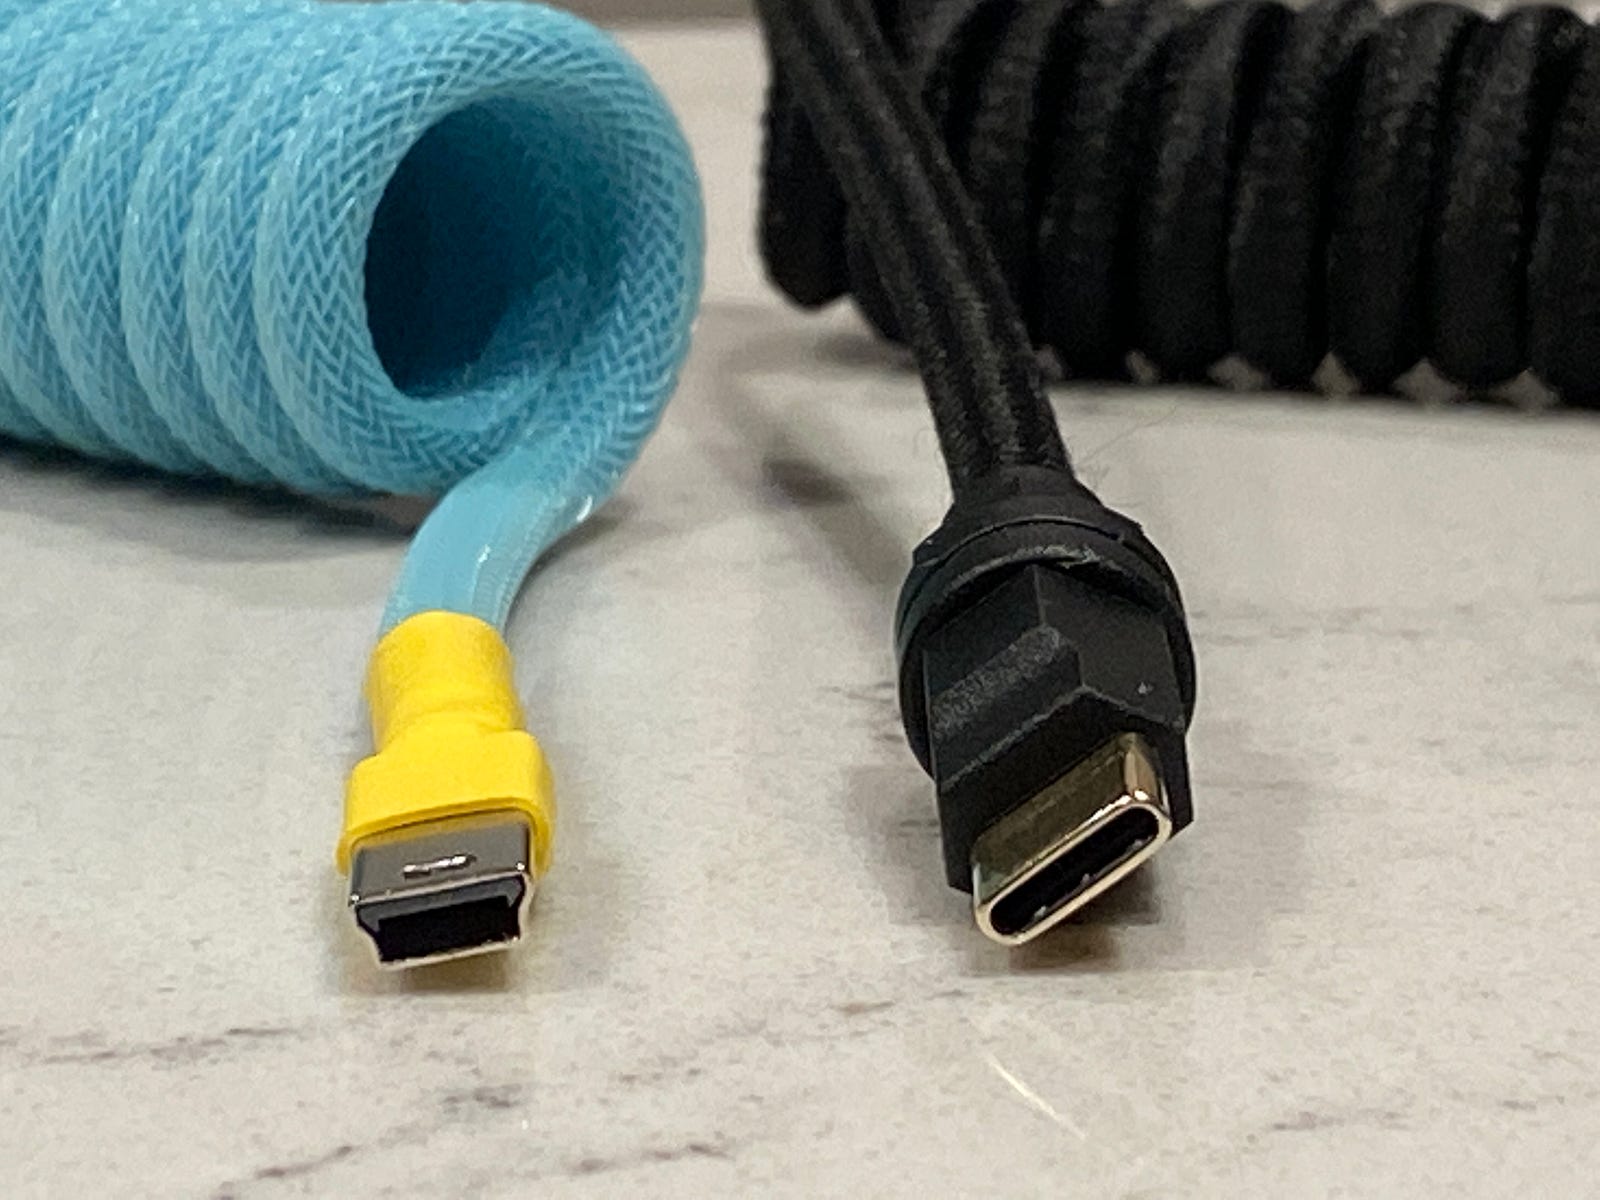 Belafonte cable from Space Cables with USB Type-B mini on the left. Then the one I ended up using on the right, a USB Type-C.
As you can see, one of these things is not like the other. Doh 🤦♂!
Process
This build was different that the last few builds for a few reasons. First, it actually had instructions! Second, it didn’t require any soldering (due to the hotswap connectors).
Still, I started this build like any other. I mapped it out in my spreadsheet, collected all the pieces, and started assembly.
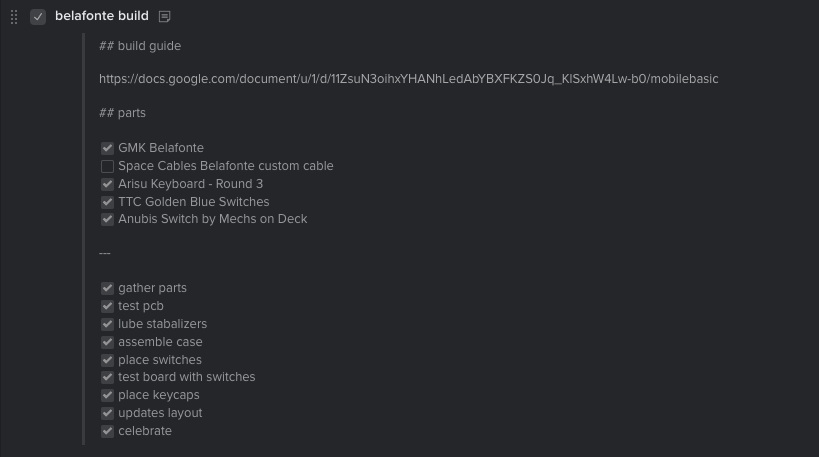 Todo list from https://www.nirvanahq.com/ item
Test The PCB
 Test The PCB!
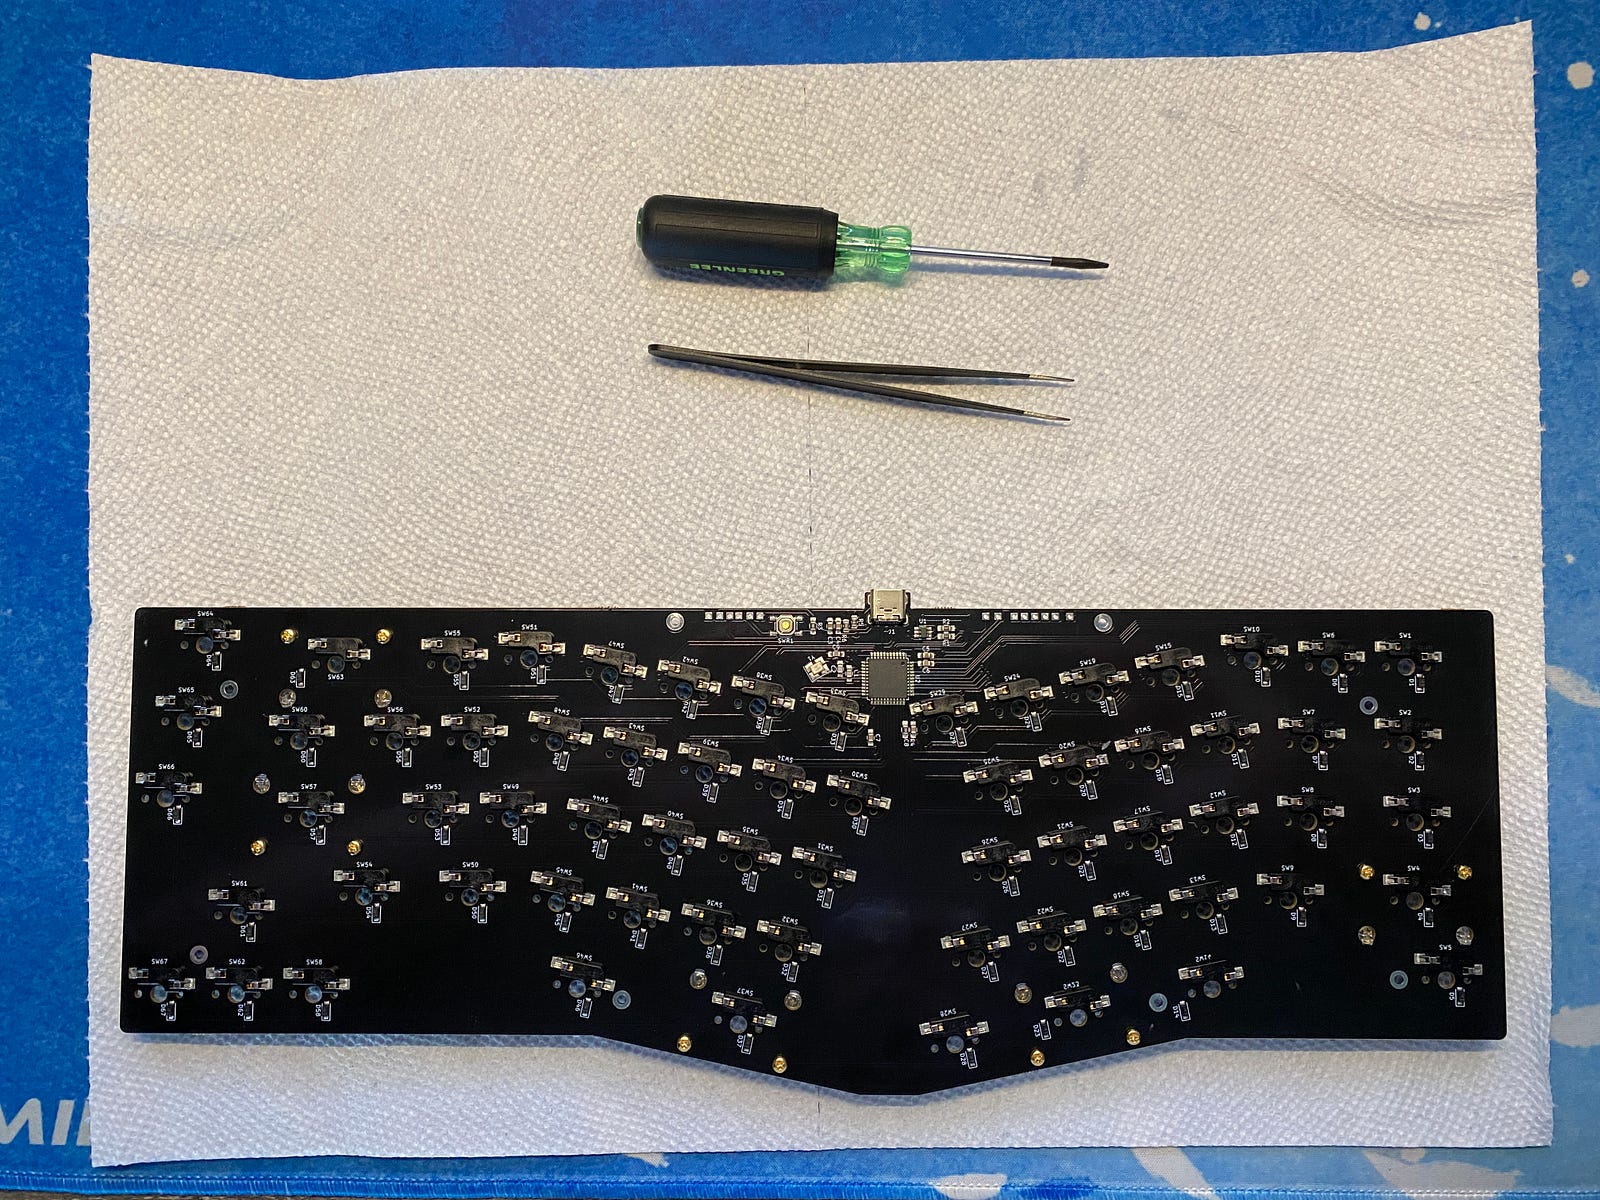
I always start with this step .This is seriously the most important step. If you get anything out of this article please let it be this: always test your PCB first! There is nothing worse than getting halfway through a build only to discover the PCB is shot.
Staring the build by testing the PCB led me to discover I had the wrong cable. Thankfully, I had another one laying around with the correct connectors.
For testing, all you need is a tweezer and the QMK Configurator. I wrote about this in detail in my last build where I built the Lucky Jade.
I Built A Mechanical Keyboard
_The Lucky Jade Build_medium.com
Lube the Stabilizers
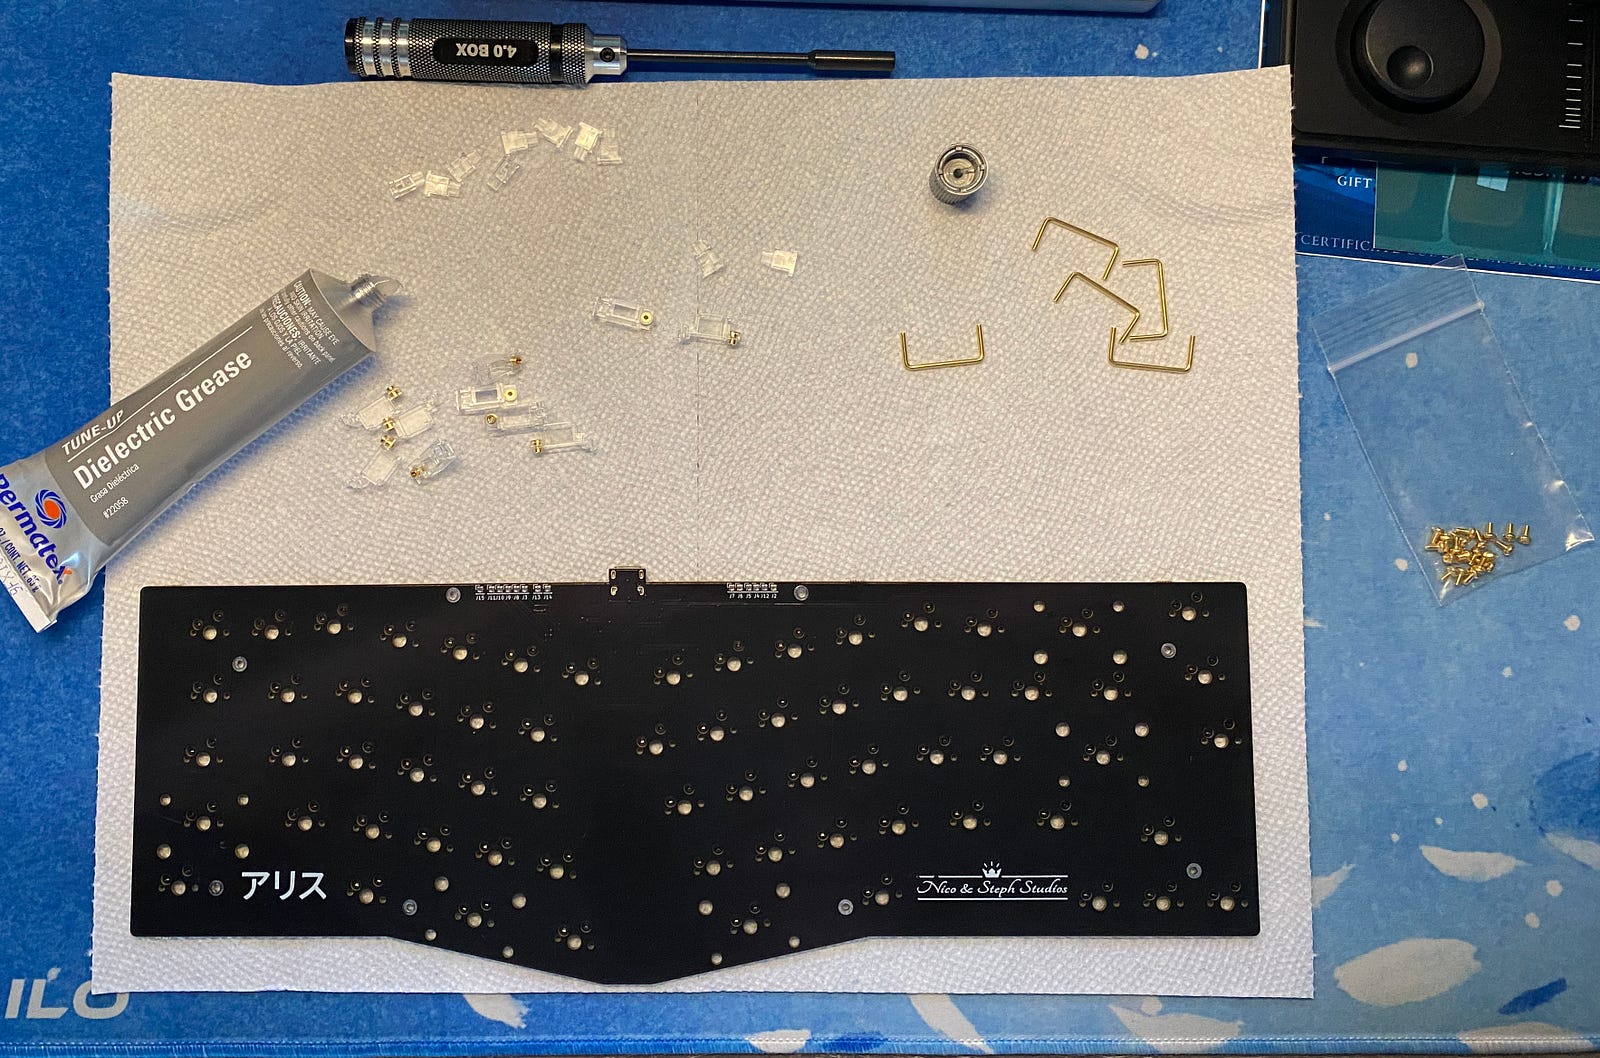 PCB with stabilizers ready for lubrication and assembly
Oddly enough, I’ve never been one to lube switches. I tried it once and I felt it dramatically changed the feel in a negative way. I do however, lube the stabilizers.
This is a fairly quick process. Dip the stabilizer arm in dielectric grease before attaching it to the housing. Stabilizers like these already require an amount of assembly. Adding this is extra step is trivial and definitely worth it.
Why Would You Lubricate The Stabilizers?
Because this is a moving part. The stabilizer arm is going to run against the housing every time it is used (two times actually, up and down). Adding a little grease both cuts down on friction and helps extend the life of the stabilizer.
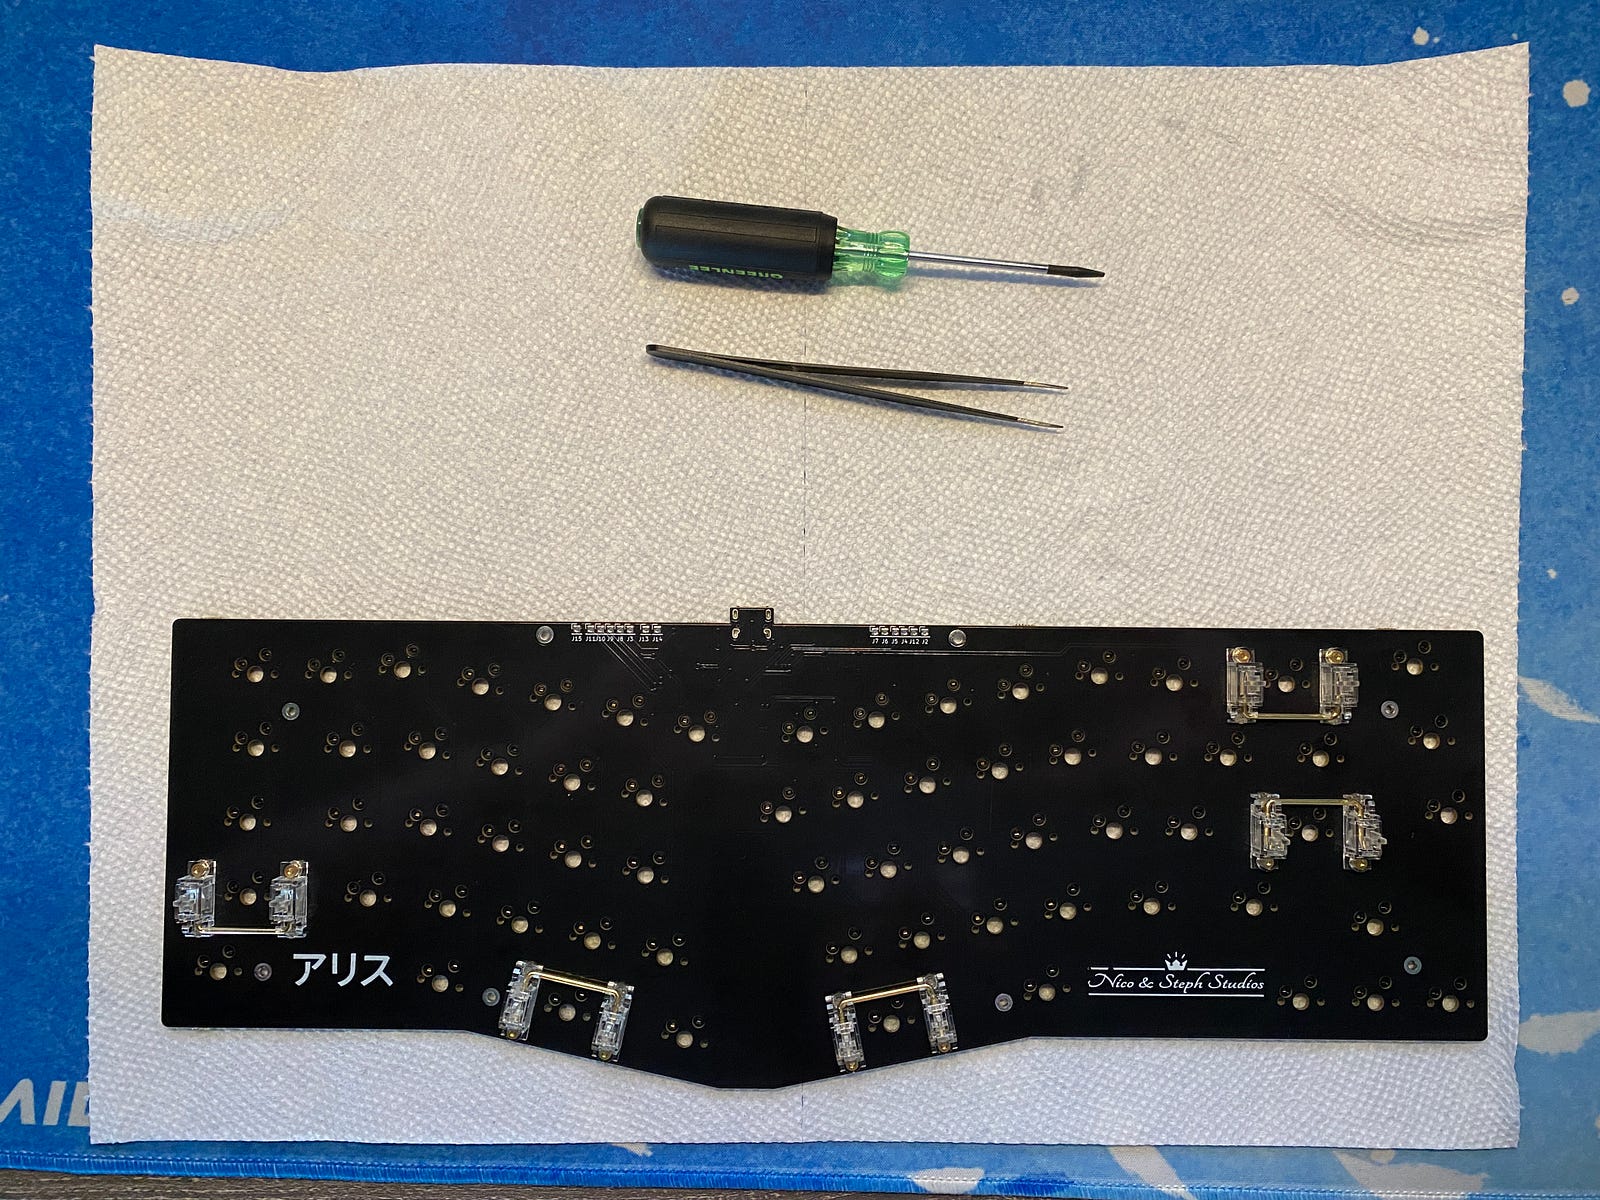 PCB with stabilizers secured
Wanna learn more? Check out this video from Taeha Types. This is where I learned how to do it.
The Acrylic
Yeesh.
This was easily the worst part of the entire build: peeling the paper off the acrylic.
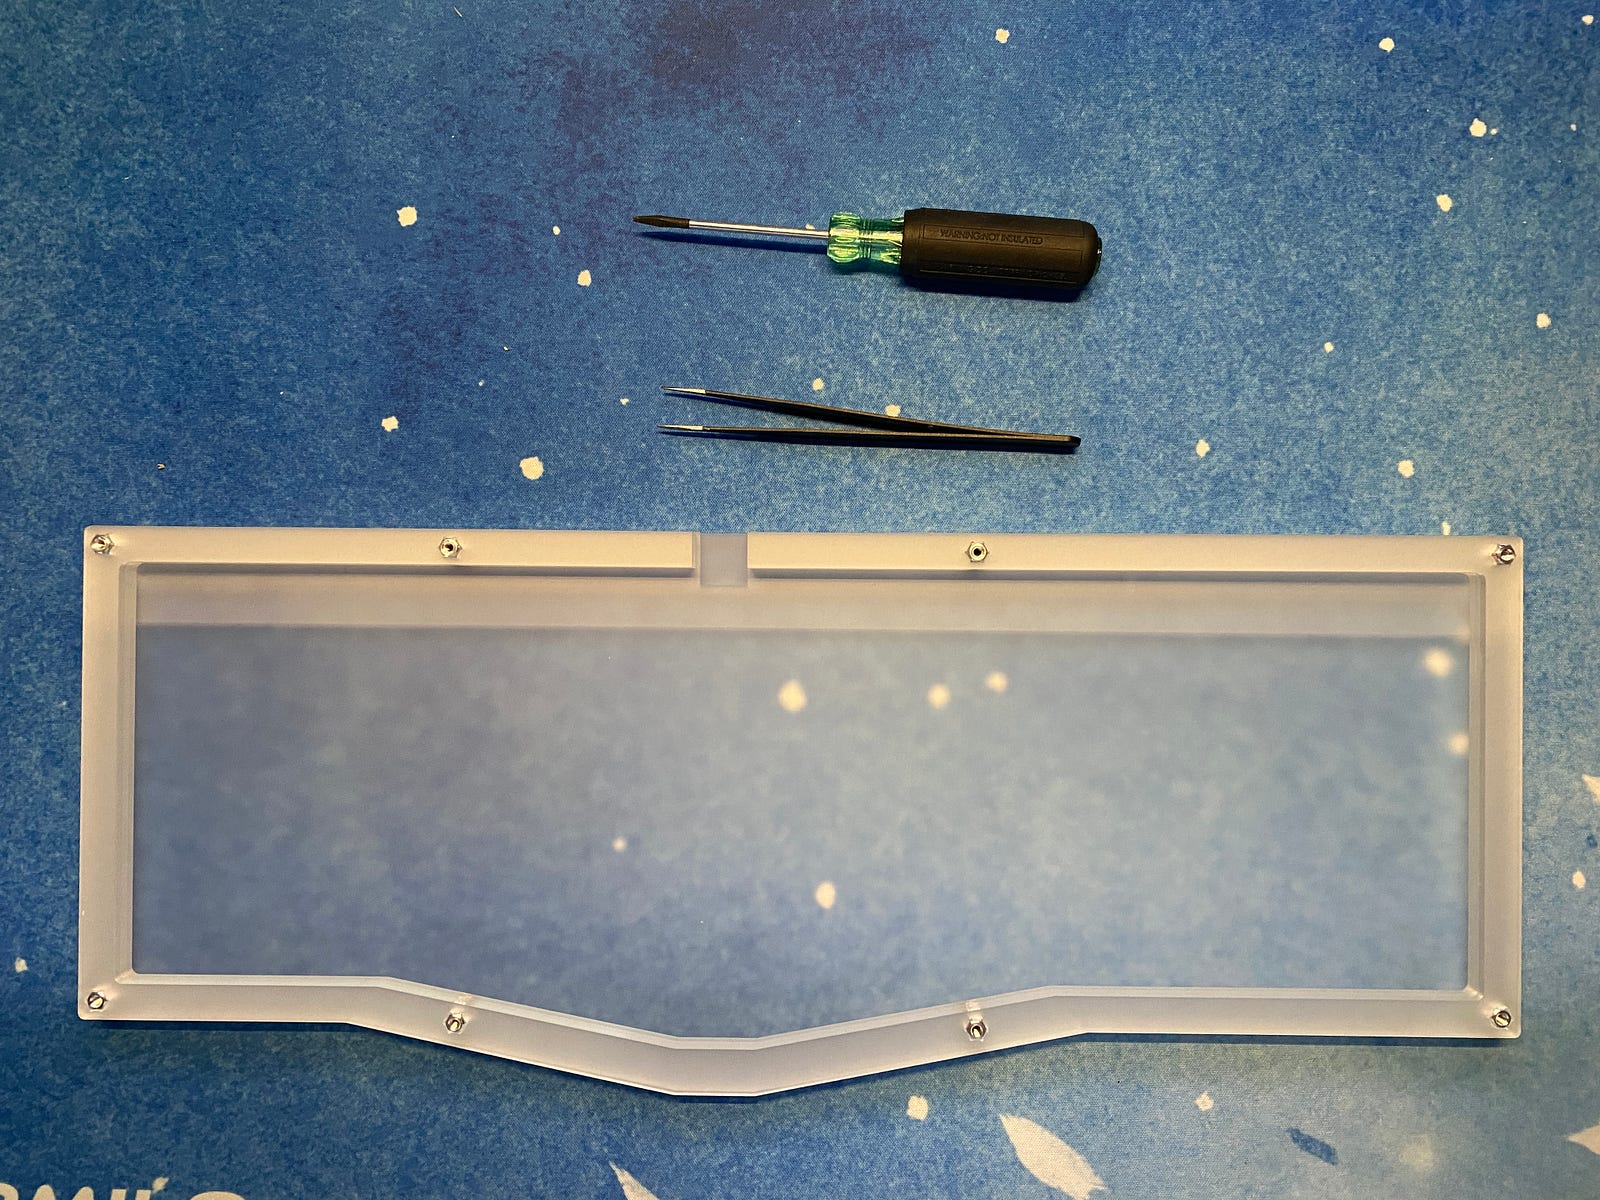
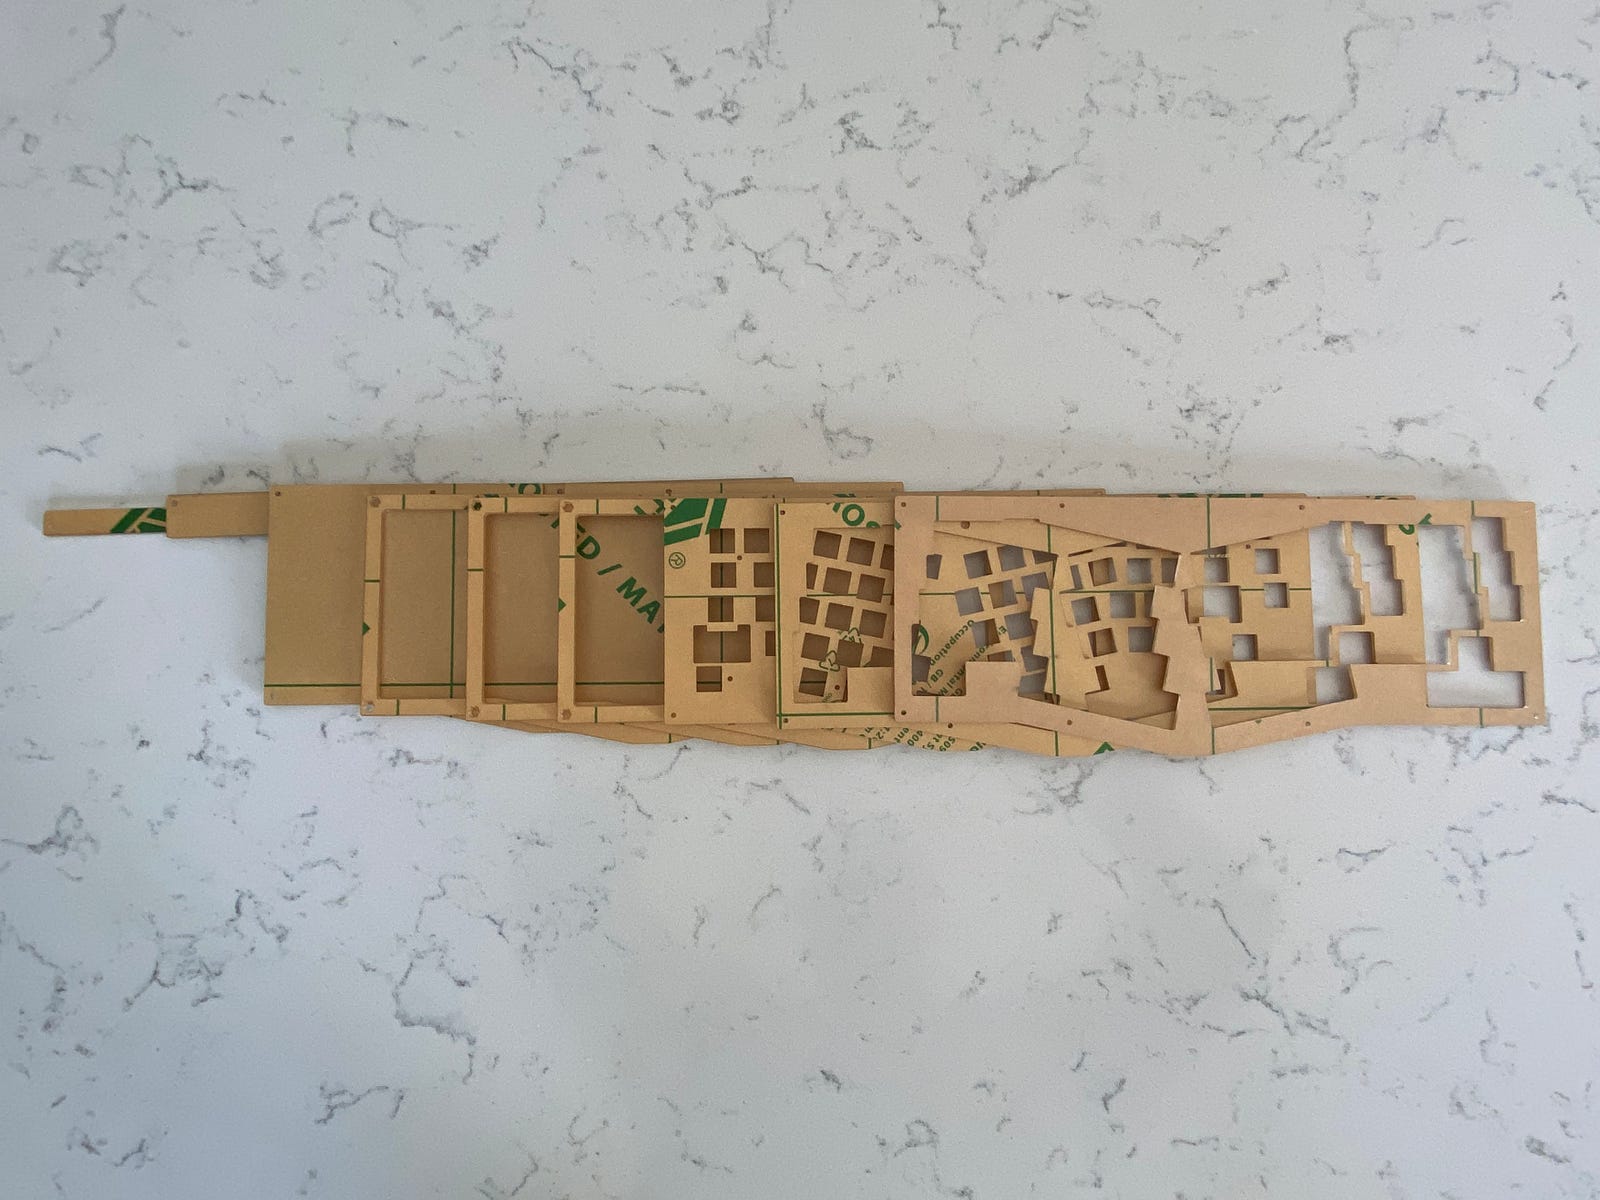 All 7 layers of acrylic with protective paper covering
There are 7 layers of acrylic here. Each layer with protective paper on both sides! I’m sure there are efficient ways to peel the paper off, I just used my fingernail. All together it probably took an hour to peel each layer and make sure everything was cleanly off.
The Base
This part was dead simple. Place 8 screws into 8 holes and screw them into 8 hex standoffs. That was it. EvenI couldn’t mess this part up!
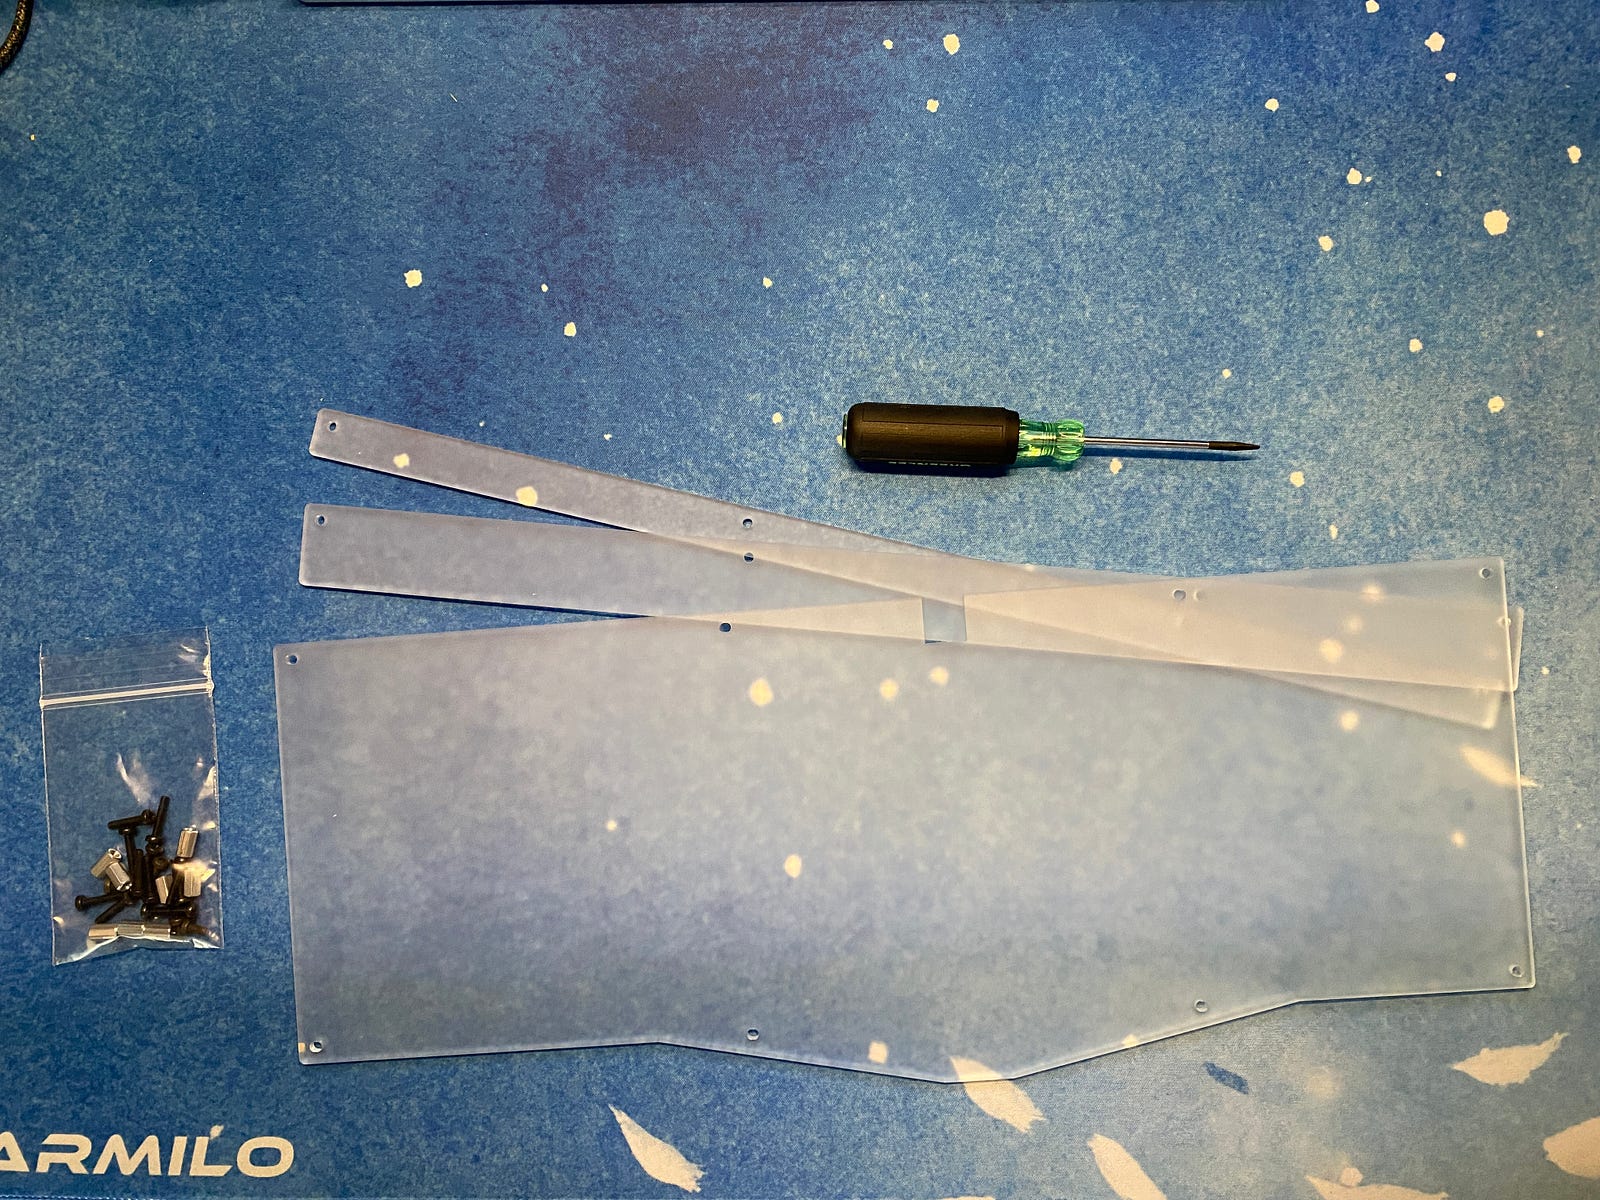 Bottom 3 layers of the case stacked and ready to assemble (incorrectly)
Here again, turns out I was wrong, I made a mistake. I could mess this part up.
You’ll see in this photo the slot of the USB cable is on the right side. You’ll see in the next photo, it is on the left. It seems I had reversed the orientation of the base. Thankfully, I figured this out early on. It only took a few minutes to right that wrong and get back on track.
 Base and next 3 layers of the case assembled in the correct orientation. Note the hex standoffs and the position of the USB cutout.
Attach PCB and Place Switches
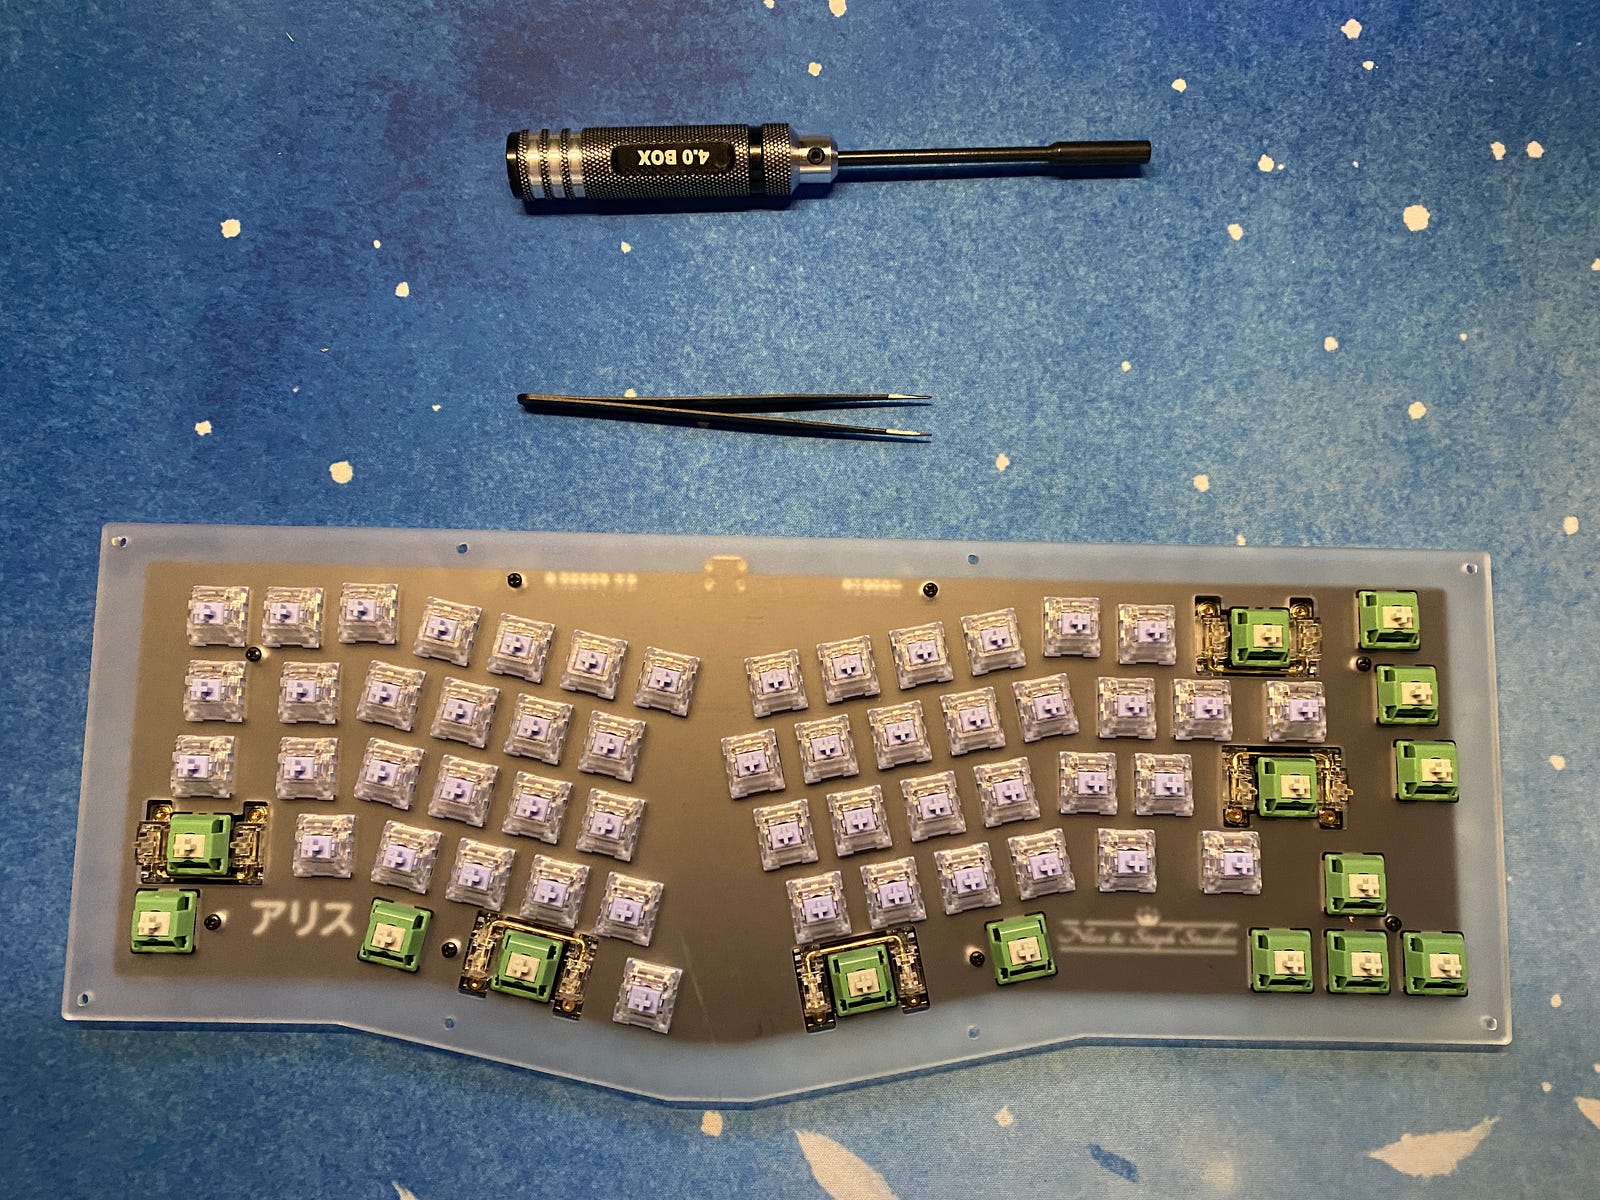
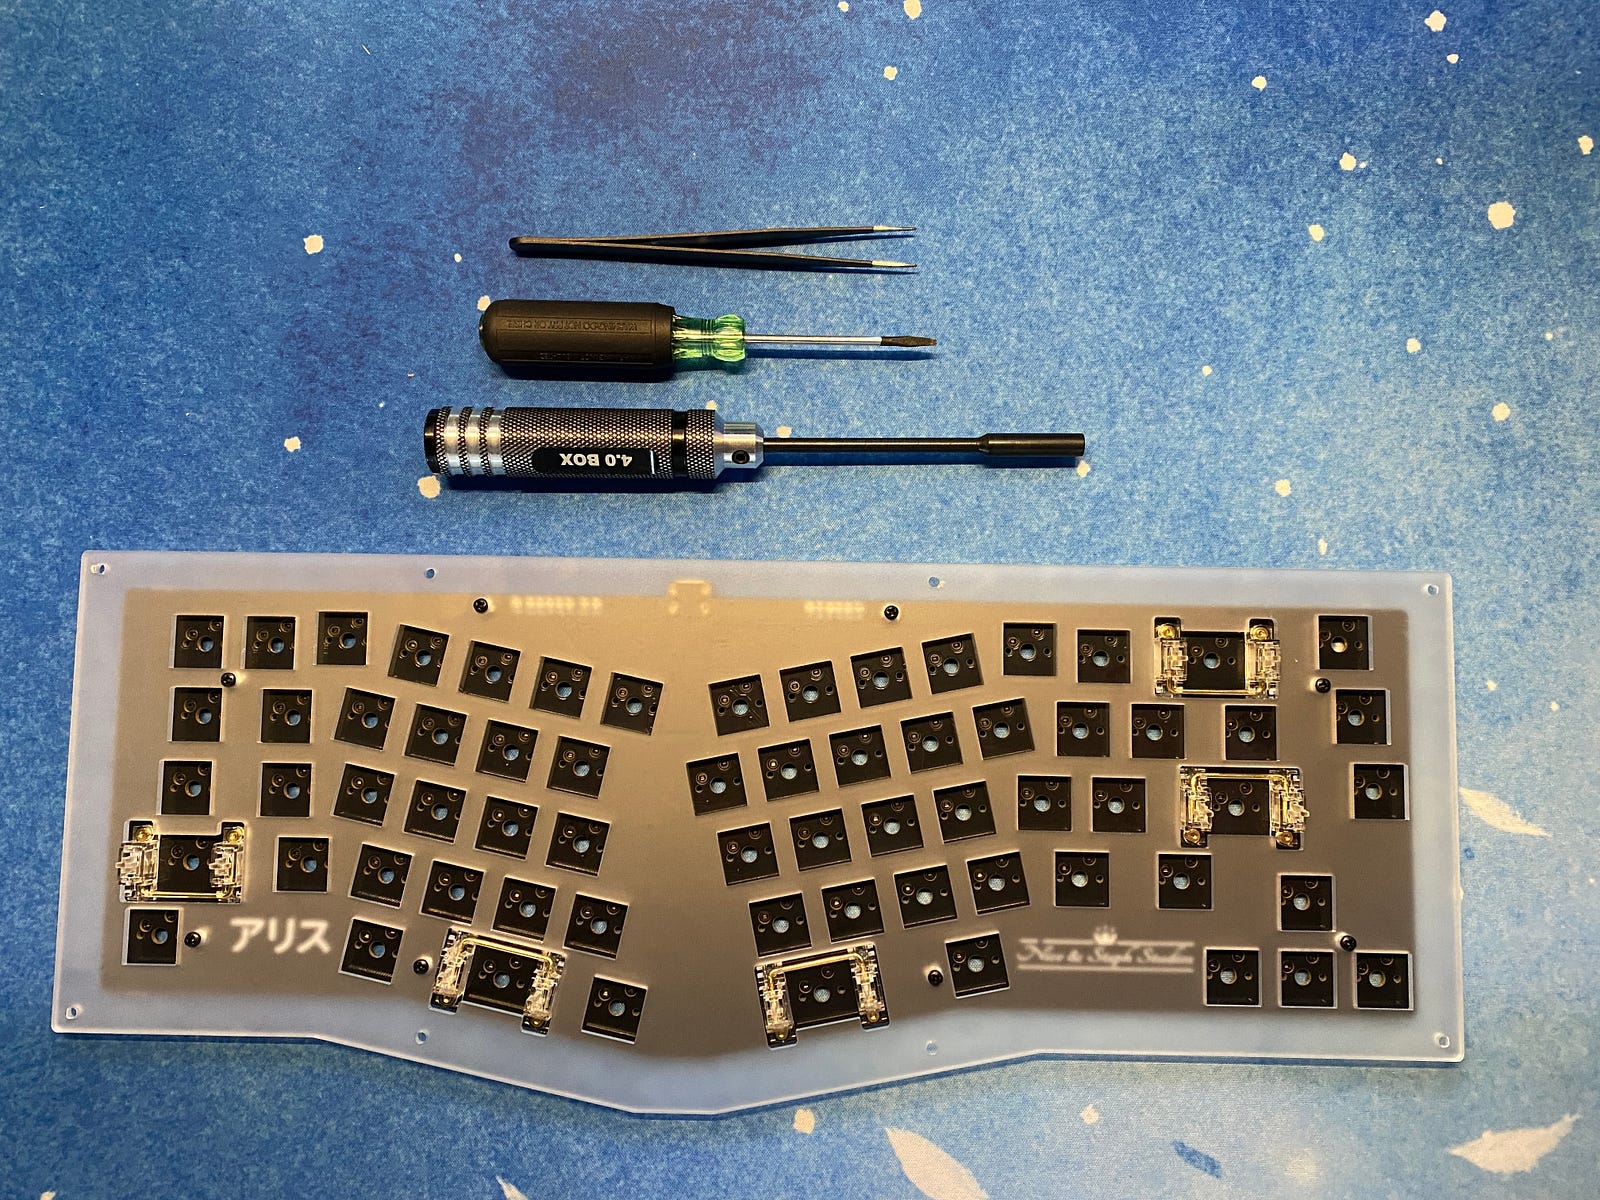 PCB attached to the switch plate. Pictured here with tweezers, screwdriver and the hex driver that came with the keyboard.
8 more screws through the switch plate and out the other side. These were secured with tiny hex nuts. This keyboard came with a handy tool to help with this part.
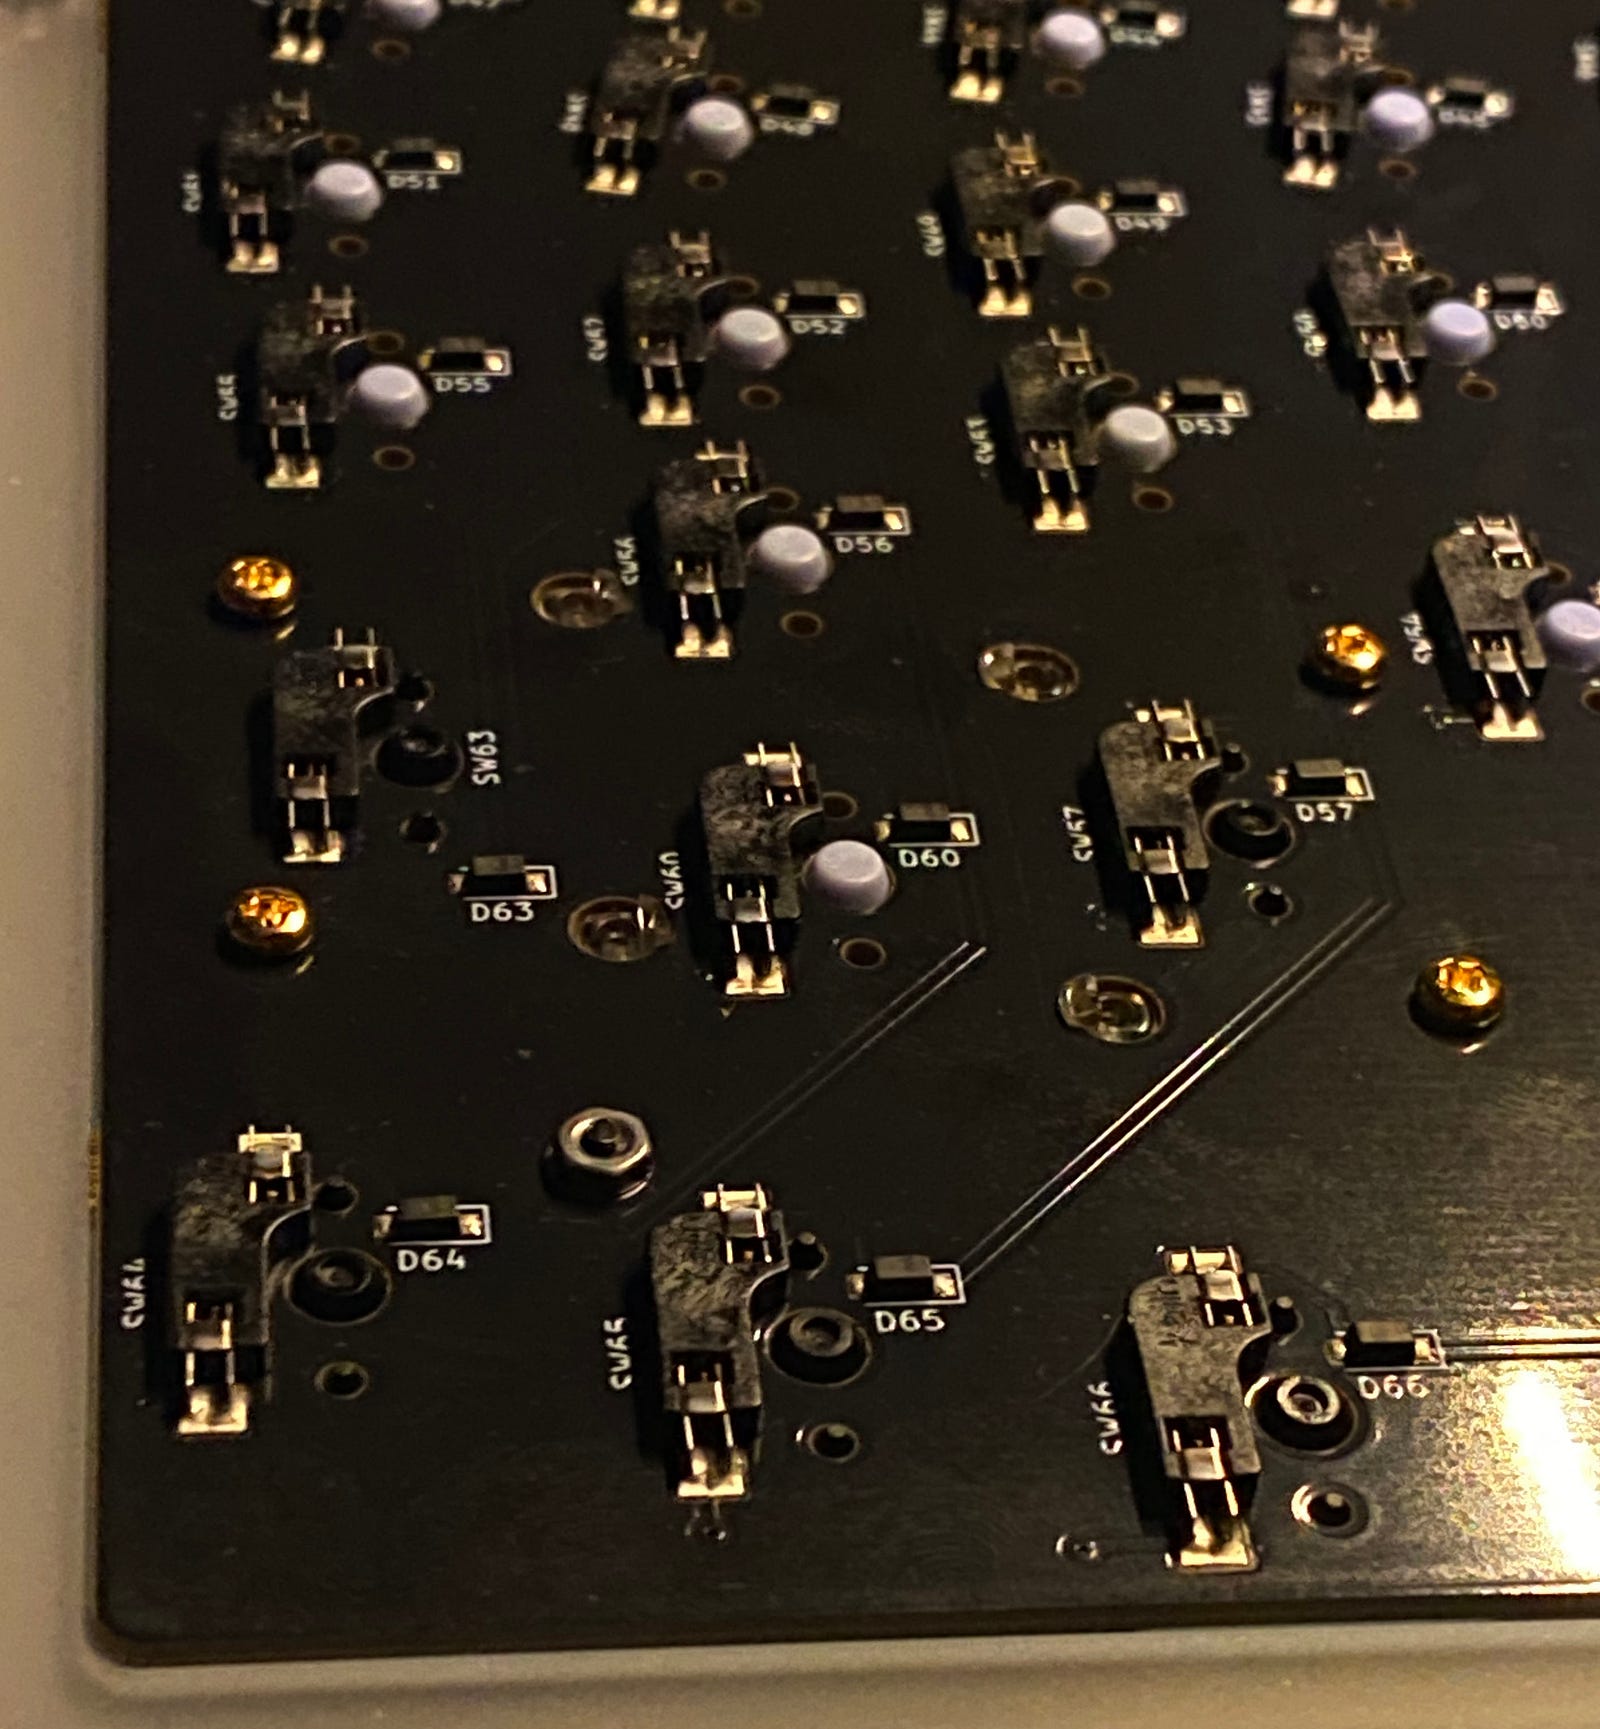 You can see the hex nut in the lower left. Also pictured are the gold plated screw-in stabilizer screws, hotswap connectors and diodes on the back of the PCB
This is where this starts looking like a keyboard and not just a stack of acrylic.
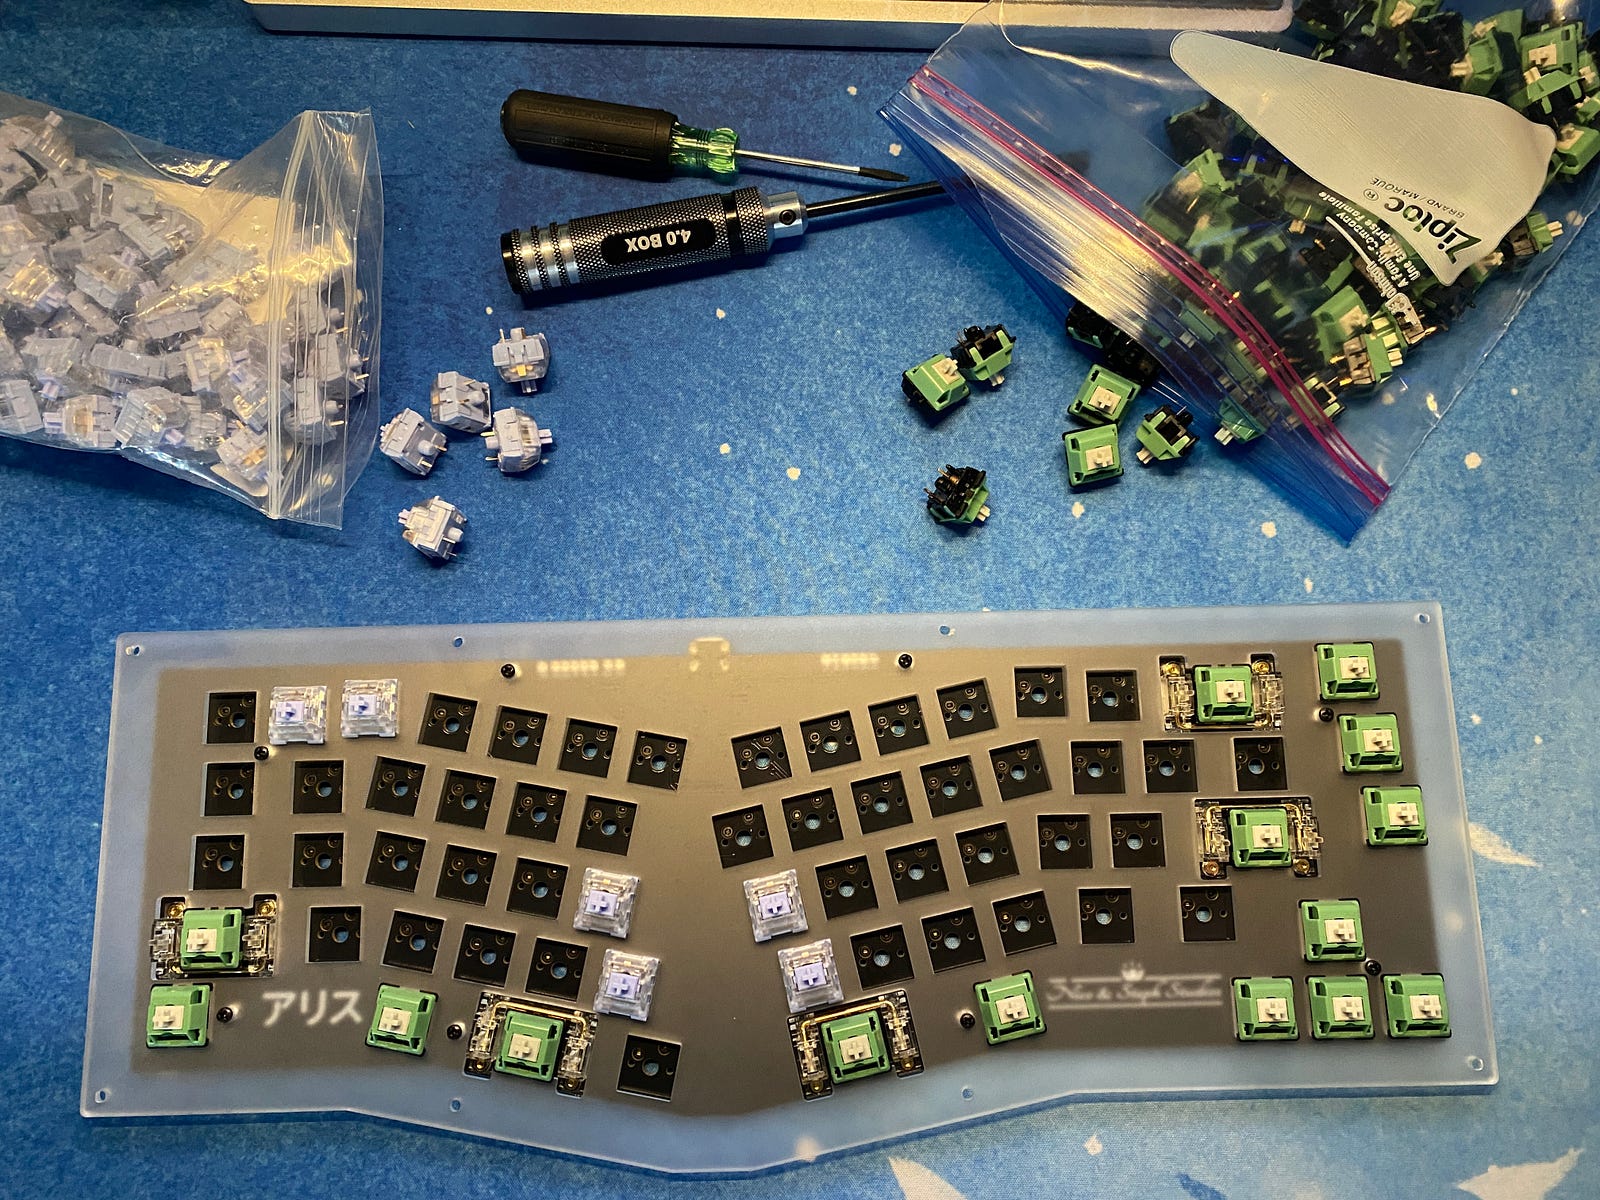 Starting to place the switches. Anubis switches first on the outsides, Kailh switches on the inside second.
This is my first hot swappable keyboard. Placing the switches at this stage, I’ll admit, felt a little weird. For the most part, they just snapped right in. The build guide said that if a switch did not snap in, you should back out some of the PCB mounting screws. This did the trick. I was eventually able to get all the switches in place.
Test The Switches Again
 All the switches in place and ready to test again!
All the keyboards I’be built before were run by a piece of software called QMK. This board, however, is run by something different called Via.
These bits of software are used by the microcontroller built into the board. The microcontroller interprets each key press before sending them to the computer. Using these bits of software, you can program your keyboard to do things ordinary keyboards just can’t do.
When I reached this stage, it was getting towards the end of my available time window. I had to leave to pickup my children soon.
I quickly tested the keys using the QMK Configurator just like I had when I started. This time, though, 3 keys appeared to not be working. Strange. Good news is, because I tested the PCB at the beginning, I knew the PCB was working. That meant the switch must not be placed correctly or it’s just a bad switch.
At any rate, I needed to leave. I marked those switches and planned to come back to it in the morning.
For reference, I had about 3 hours into this build so far.
The Next Day
Waking up the next day, my entire family had suddenly caught some sort of sickness. Let’s just say, it was a messy morning. Thankfully I was still healthy and planned to continue the build once everyone else took a nap.
A day’s rest has a way of reframing challenges. I talk about this in Your First Year As A Software Engineer. Sleeping on a problem usually, but not always, brings about a solution quickly the next day.
Once everyone was napping, I re-read the docs and noticed they called out an app called Via for managing keymaps. I totally glossed over that the day before and decided to install it.
I re-ran my switch test and found two switches were still bad, so I replaced those. But one switch, the one initially programmed to switch layers, was working! This made me happy cause I originally thought this one was actually dead.
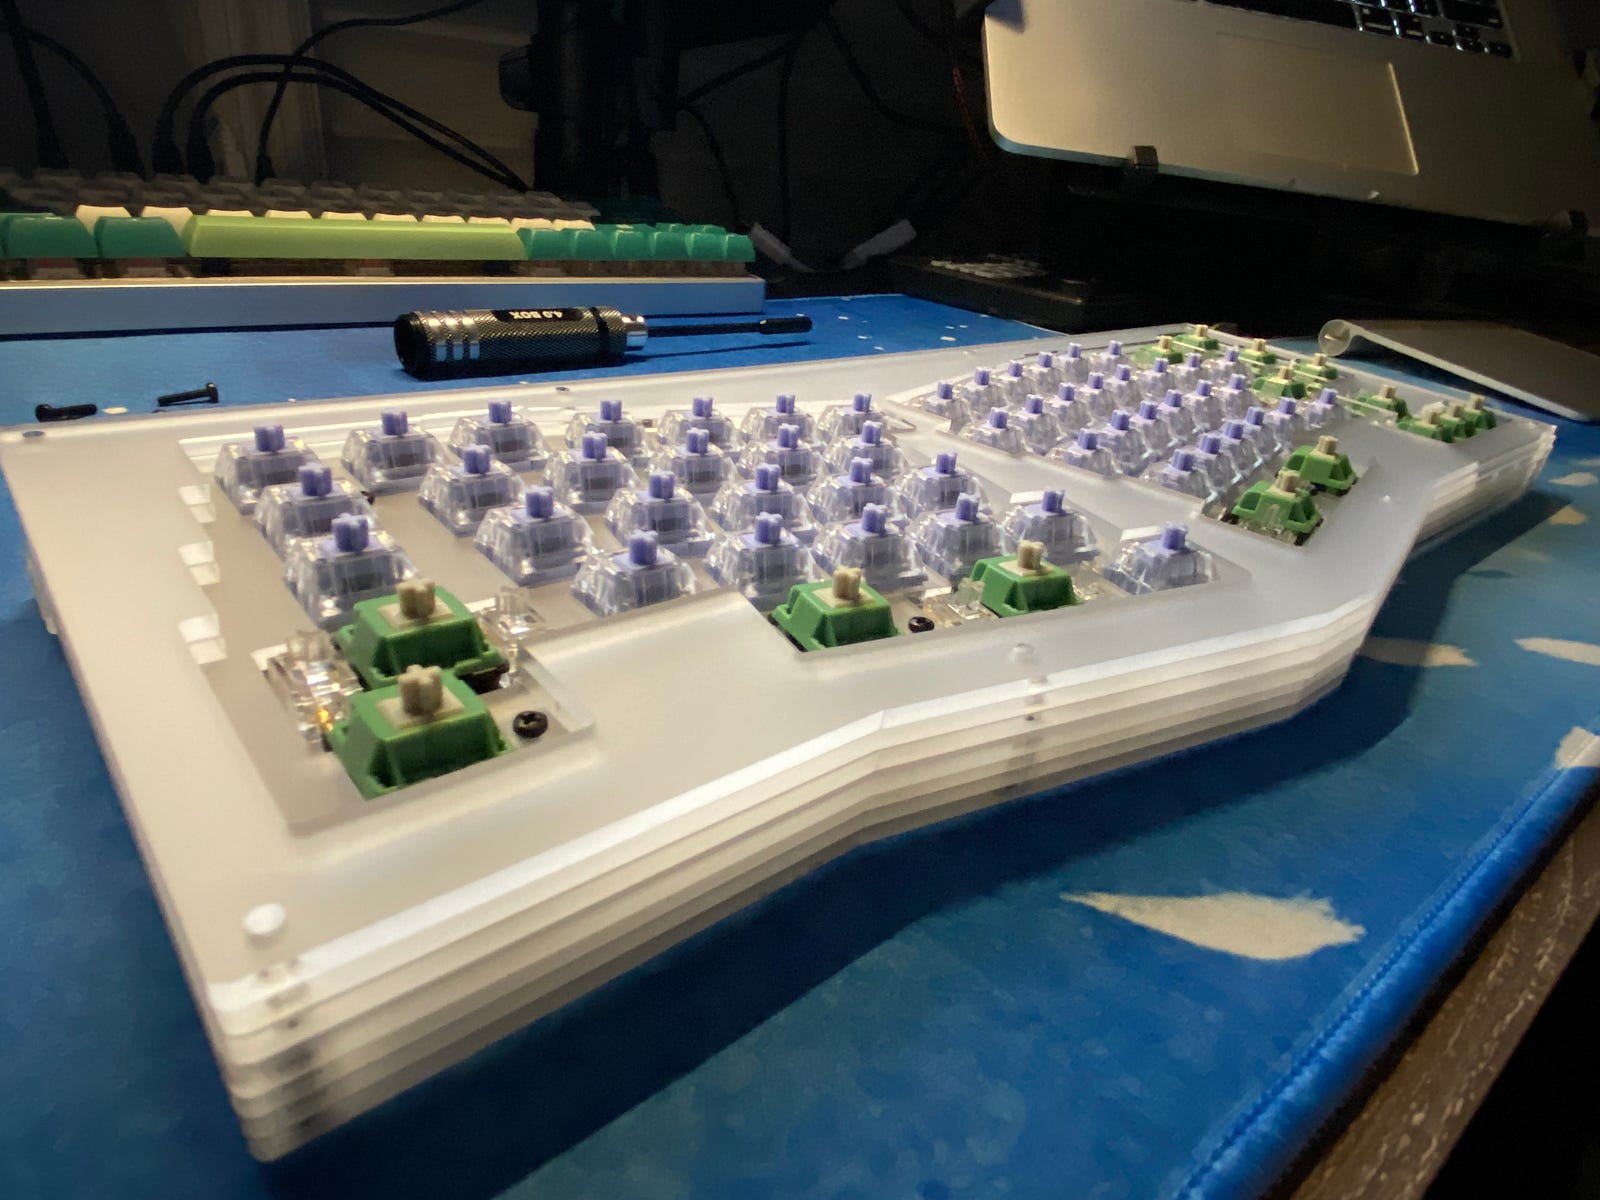 All acrylic layers installed and switches placed, ready for keycaps
After this second test, everything checked out! All the switches worked and were responding well. 🎉
Keycaps
The is close to the last step. This is where the whole keyboard comes together. This part is a little harder than it may seem, though. I usually agonize about which keys should go where. I mean, the letters are easy, it’s the decorative ones.
Take the Esc key as an example. There were 5 or so variations I could have put there. It took be some time to figure out which one I liked. Multiply this by the 10 or so decorative keys and you can see how I loose some time here.
My 4 year old helped me place some of the letters. By the time I made it here she was up and, though still sick, less so after a long nap.
She is an enthusiastic helper and welcomes any opportunity to help. She calls the keyboards “computers” and it really couldn’t be cuter.
Final Keymap
Whats the fun of a mechanical keyboard without custom keymaps? I’ll say, I don’t go overboard on my keymaps. There are, however, a few things I do change. I never use the Caps lock key and, in my opinion, is a wasted key. I always re-map this to Ctrl. I occasionally Vim, and when I do I use Ctrl quite a bit.
Here are is the final keymap straight out of Via:
Layer 1
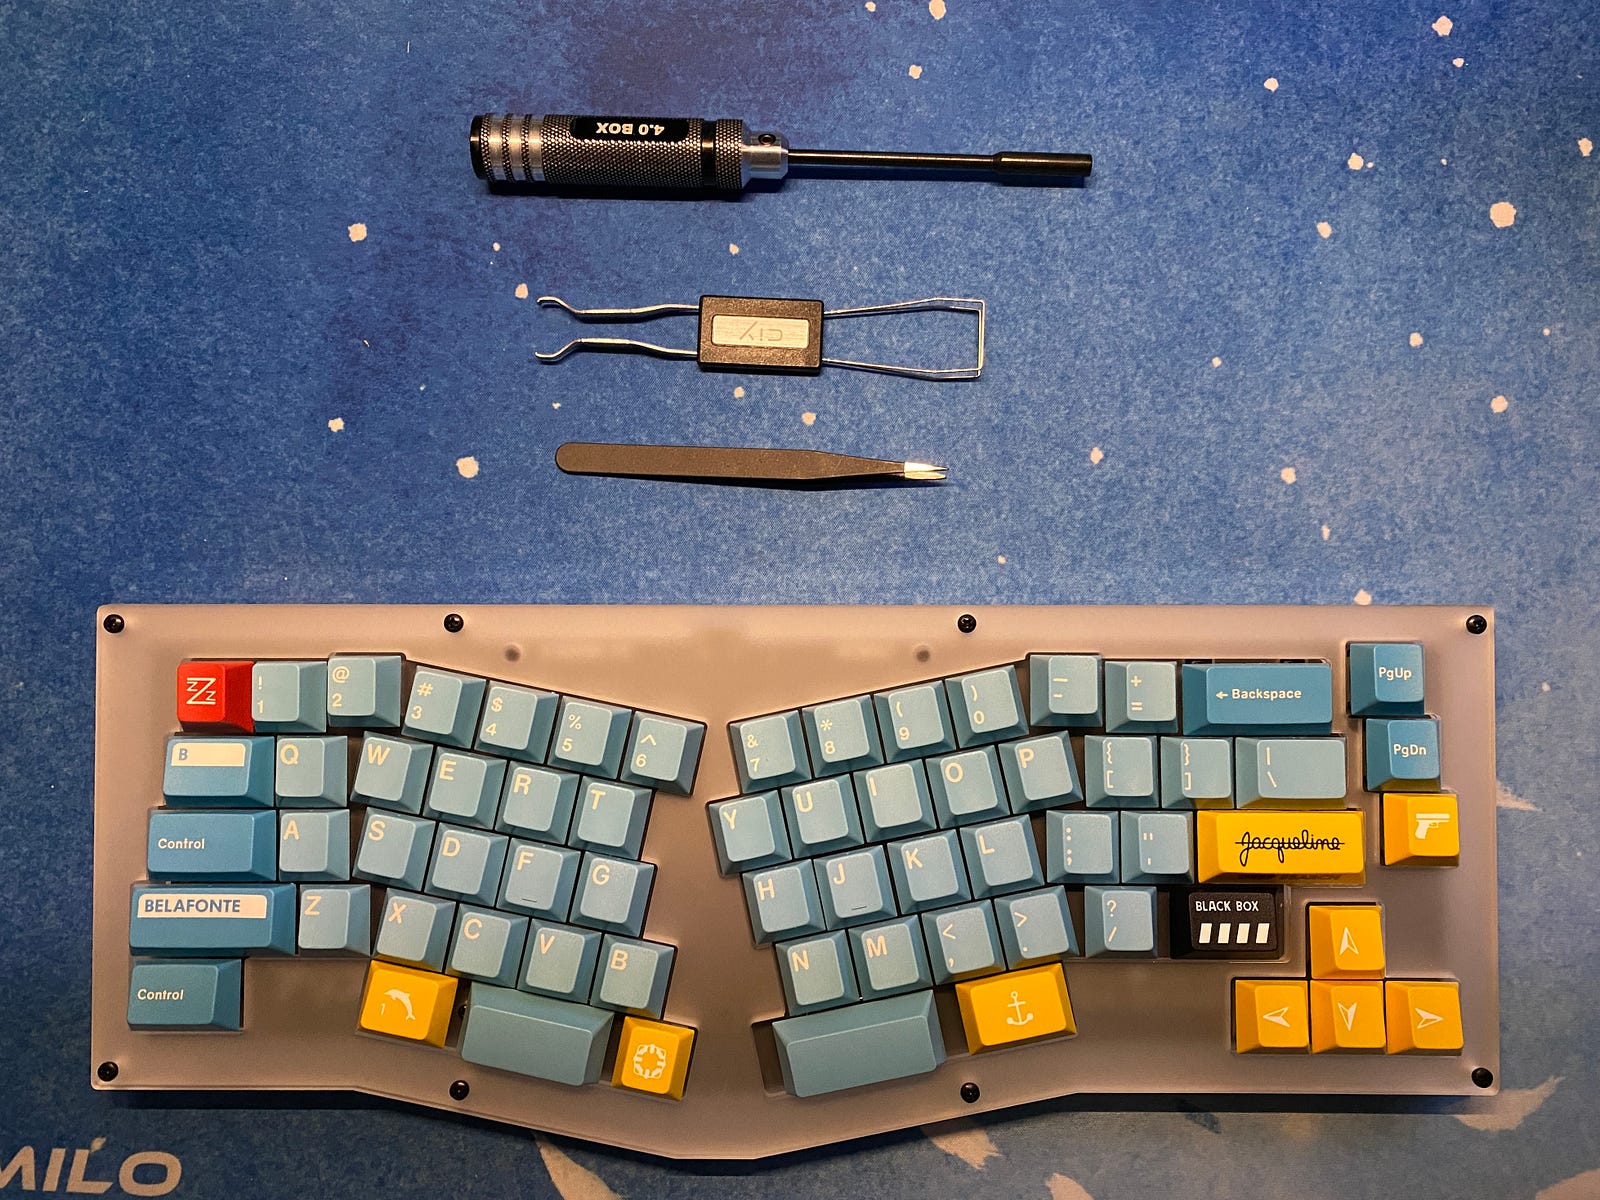
 Layer 0 of the keymap
This is the normal typing layer. This shouldn’t look too far out of the ordinary, save the Caps lock key replaced another Ctrl key.
Layer 2
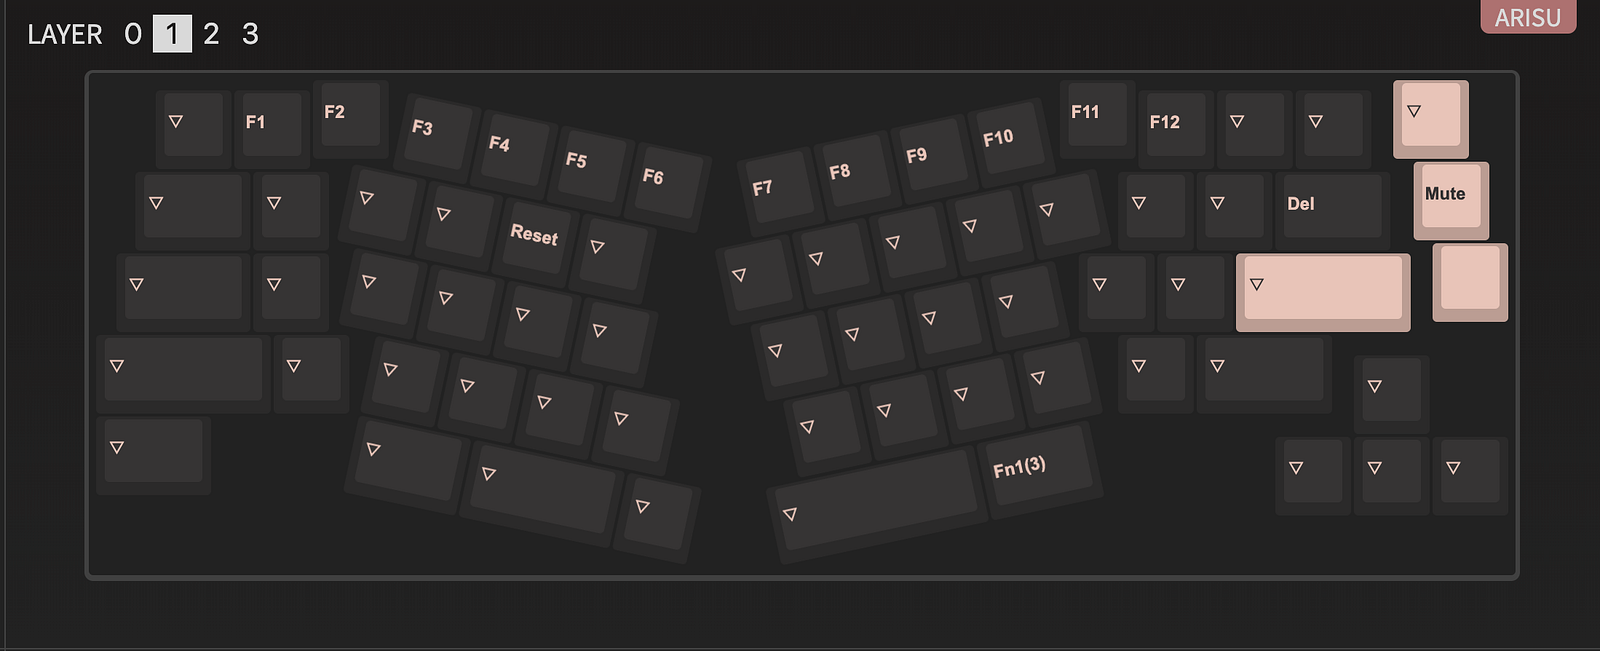 Layer 1of the keymap
This is primarily where the F keys live, along with just a few other things.
Since the keymaps are so easy to change using Via, I may take advantage of that more than I normally would. I might still flip the left side Win and Alt keys, my fingers are super clumsy with those two right now.
Conclusion
Overall, this build went pretty well. It wasn’t flawless, though. Mistakes were made.
I placed the first three layers of acrylic incorrectly, but that was an easy fix. Peeling the protective covering off of the acrylic was a huge pain in the butt. Not really a way around that, but I got through it.
Using Via was pretty sweet! I’m still playing with it, but it looks like there isn’t any sort of flashing step. You make the change to the keymap and the keyboard has the change right away. That was new to me.
Shortly after this build I went ahead and order a new custom cable, with the correct connectors this time.
This keyboard is going to replace the Lucky Jade as my daily driver. The layout is different, so it’s going to take some time for me to adjust. I welcome the challenge!
Plus, this thing just looks so pretty!

References
- https://geekhack.org/index.php?topic=95054.0
- https://www.reddit.com/r/mechmarket/
- https://nicoandstephstudios.com/products/preorder-arisu-keyboard-round-3
- https://nicoandstephstudios.com/
- https://www.imdb.com/name/nm0027572/
- https://drop.com/
- https://drop.com/buy/drop-mito-gmk-belafonte-custom-keycap-set
- https://drop.com/buy/space-cables-belafonte-hennessey-aviator-custom-cables
- https://spaceholdings.net/
- https://drop.com/buy/zeal-pc-transparent-gold-plated-pcb-mount-screw-in-stabilizers
- https://cannonkeys.com/collections/switches/products/anubis-switch?variant=39822789279855
- https://drop.com/buy/kailh-polia-tactile-custom-mechanical-switches
- https://docs.google.com/document/u/1/d/11ZsuN3oihxYHANhLedAbYBXFKZS0Jq_KlSxhW4Lw-b0/mobilebasic
- https://www.nirvanahq.com/
- https://www.youtube.com/channel/UCMHXMAeKkI6HXlPfLiYvo9g
- https://youtu.be/cD5Zj-ZgMLA
- https://config.qmk.fm/#/test
- https://medium.com/counterarts/i-built-a-mechanical-keyboard-f36a706ad38c
- https://www.youtube.com/channel/UCMHXMAeKkI6HXlPfLiYvo9g
- https://qmk.fm/
- https://javascript.plainenglish.io/your-first-year-as-a-software-engineer-155efebe77d2
- https://caniusevia.com/
- https://www.vim.org/