- Published on
I Built A Mechanical Keyboard
The Lucky Jade Build
- Authors
- Name
- Nate Geslin
- @n8rzz


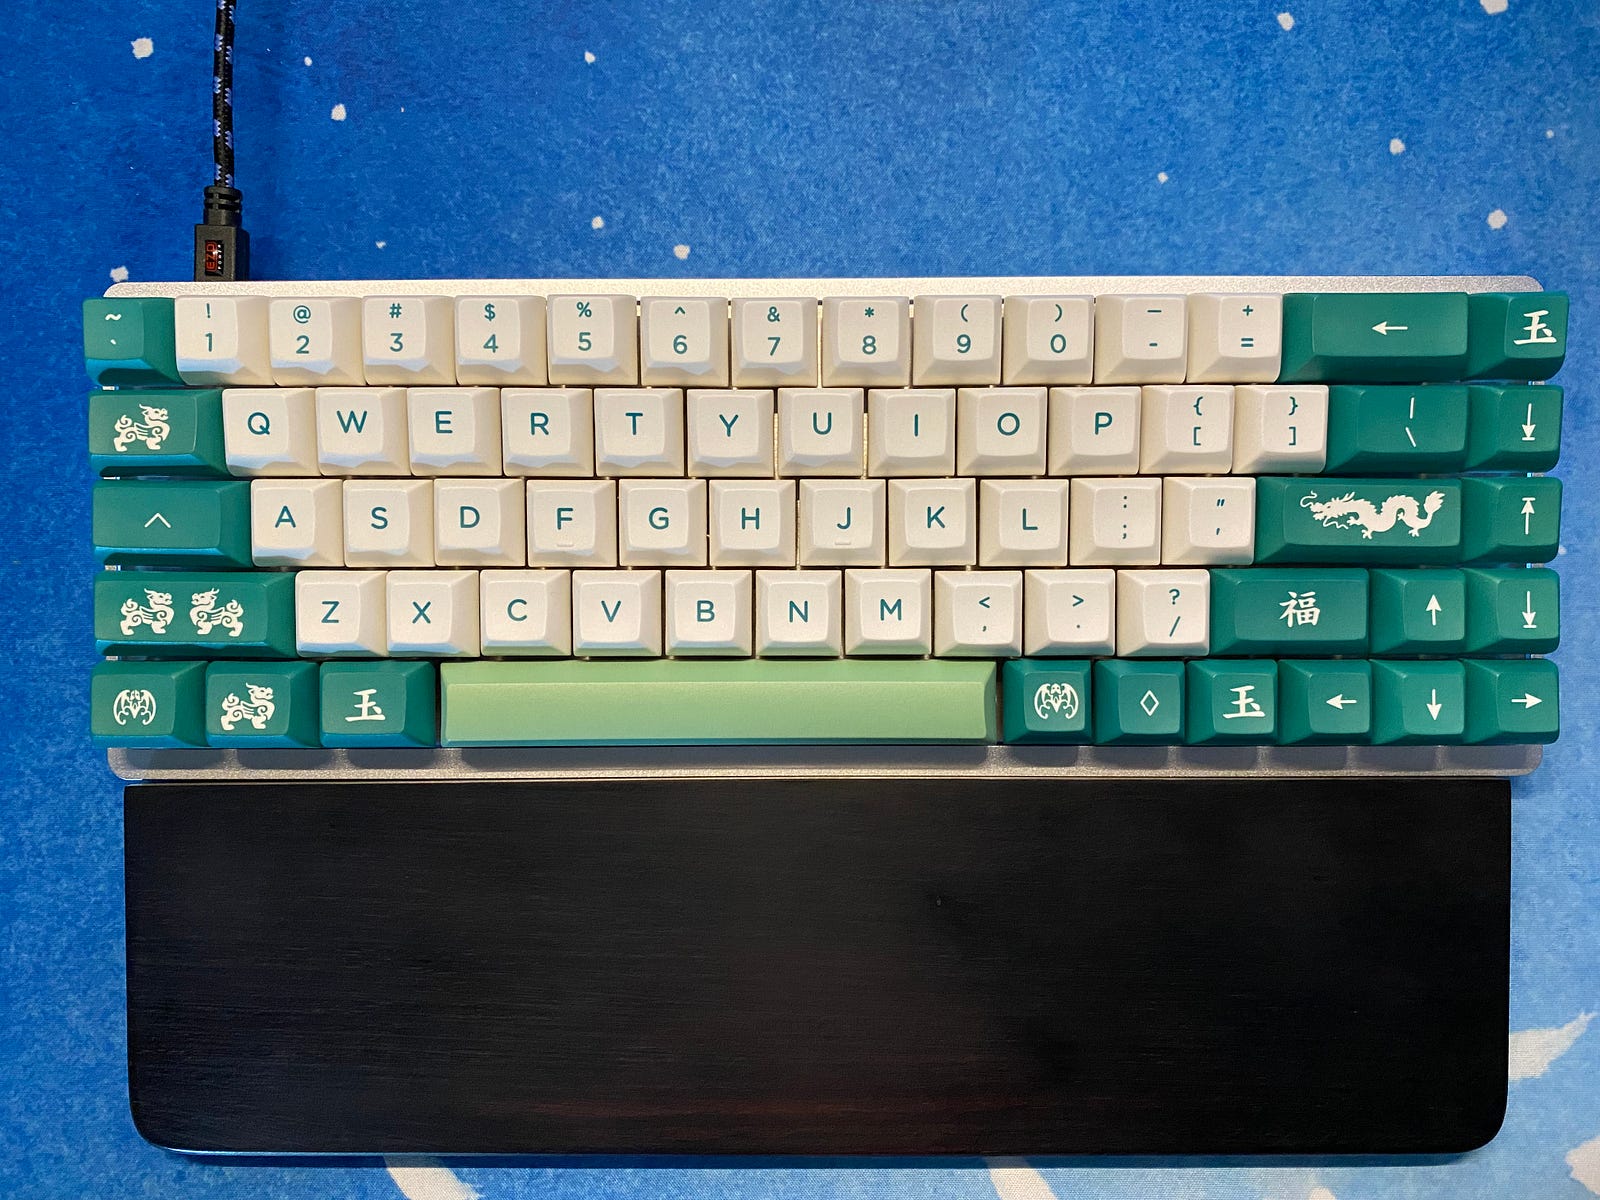 The finished build: 65% Lucky Jade mechanical keyboard.
Introduction
I wanted to share with you today my latest mechanical keyboard build.
It’s been a little over two years since my last build, and this makes my 3rd full build. I am by no means an expert, but I have been lurking around the hobby for a number of years.
I’ll mention straight away that this build could have gone better. Some things went well; however, there were some rookie mistakes I made early on in the build that would have made for a much softer landing in the end. Overall, the build did produce a nice looking keyboard that I look forward to using for the next little while. Who knows, maybe it’ll be my next daily driver?
Parts of a Mechanical Keyboard
Before we begin, lets review the major parts of a mechanical keyboard:
Switch
These are the things underneath each keycap. Their job is to complete an electrical circuit which then translates into a keypress. Think of switches as something like a light switch.
There are 3 major types of switches, Linear, Tactile, and Clicky.
There are hundreds of different switches out there to choose from, but all of them will fall into one of the three main categories.
—
Read more:
https://aziocorp.com/blogs/blog/get-to-know-your-keyboard-the-3-types-of-mechanical-switches
https://dygma.com/blogs/stories/the-ultimate-guide-to-mechanical-keyboard-switches-for-2020
Stabilizer
Some keys are bigger than others. Keys like the Spacebar, Shift, or Backspace keys on a standard keyboard. These wider keys need supports, or stabilizers, on the left and right side of the switch otherwise the key will wobble when pressed. Or, a press to one side of the key may not translate into a complete keypress.
Keycap
These are the things with the letters and are typically sold as a set and usually revolve around a theme. This theme can literally be anything.
PCB
PCB stands for Printed Circuit Board. This what the switches connect to, either via solder or hot-swappable connectors. Hot-swap connections, as the name suggests, is a non-permanent connection and allows for easily changing out switches.
A PCB is not necessary for a build, it is possible to hand-wire a keyboard if one were so inclined.
Read More:
- https://www.crackedthecode.co/a-complete-guide-to-building-a-hand-wired-keyboard/
- https://matt3o.com/hand-wiring-a-custom-keyboard/
Case
It is typically made out of some sort of metal or polycarbonate and is the container for all the keyboard parts and should be sturdy enough to keep everything firmly together while the user types away. These come in all shapes and sizes and are sometimes described by percentages. 100% is equivalent to full size keyboard with 10 key.
Read more :
Sourcing Parts
I’ve been slowly collecting the parts for this build for the last 16 months, since around February 2020. I tend to build Keyboards based on the keycaps, so when the Lucky Jade group buy popped up, this keyboard was born.
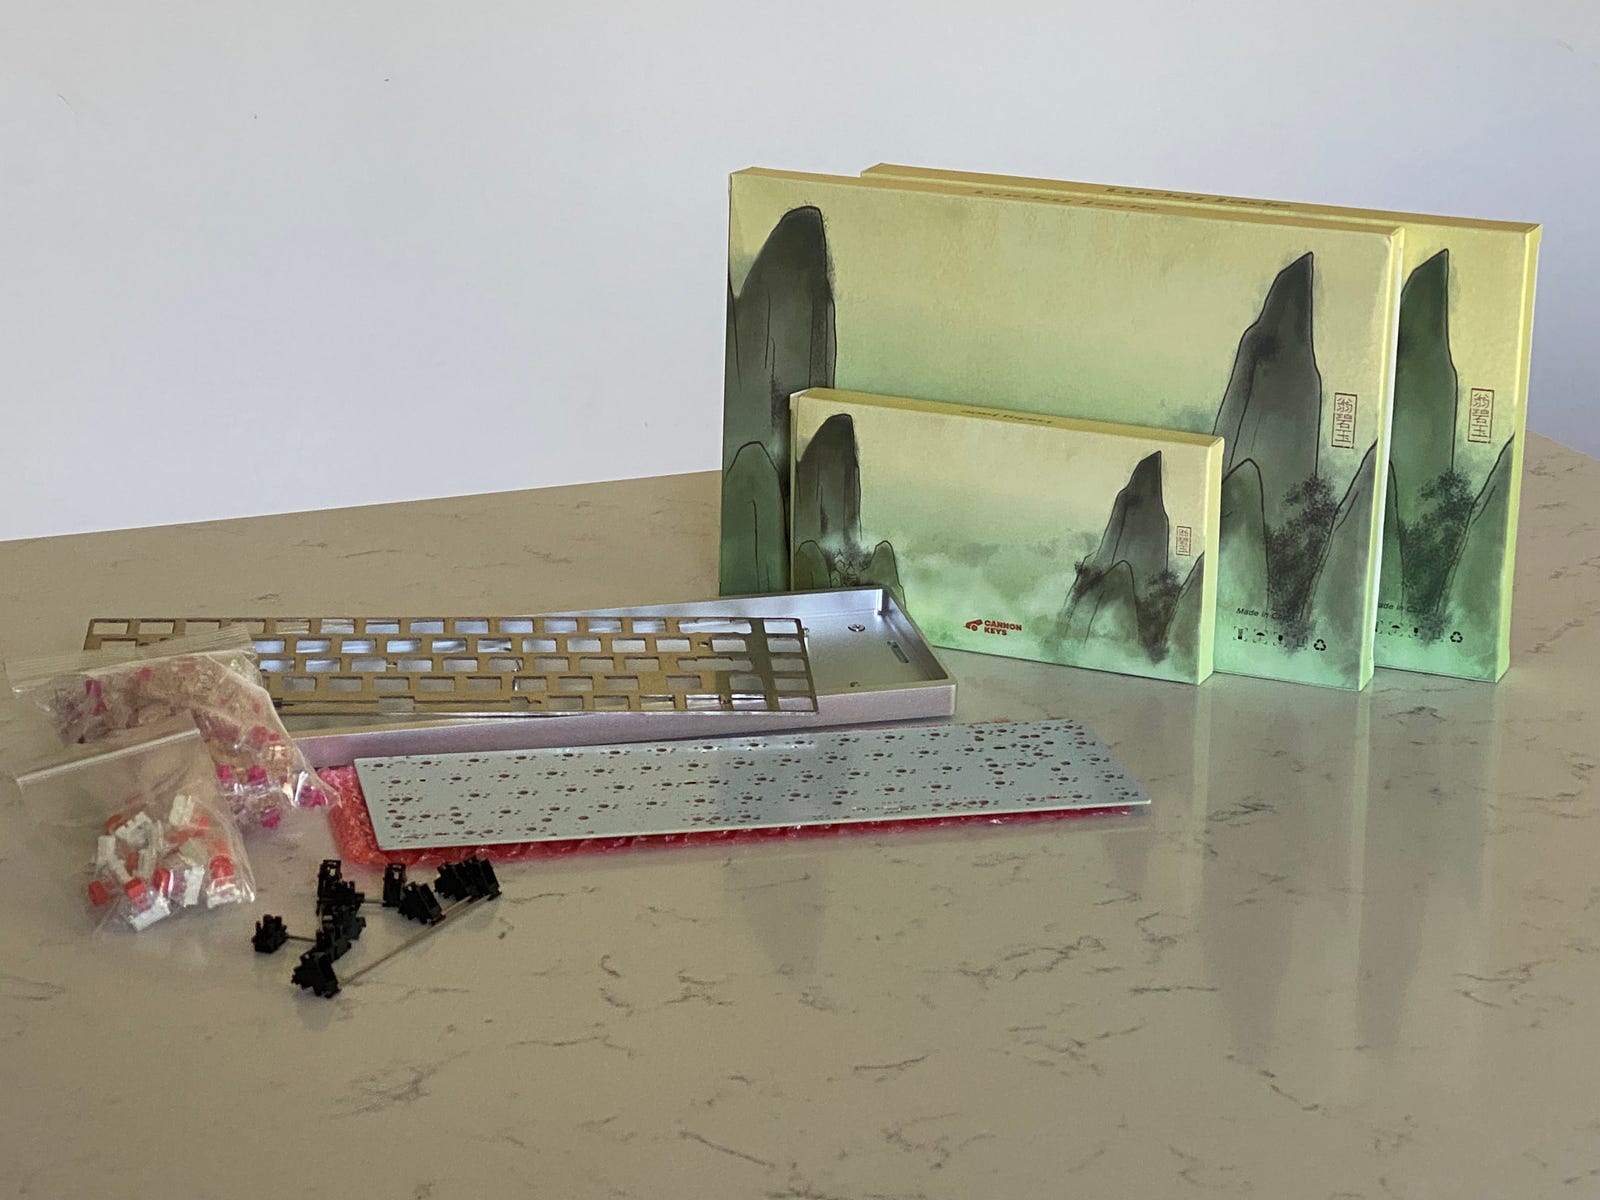 Aliaz Silent Tactile (60g) and Kailh Burnt Orange switches, Lucky Jade keycaps, Tada68 65% PCB and Silver, Aluminum case. Pictured with plate mount stabilizers
Other than the keycaps, this is a pretty straightforward build. We will be building on a 65% PCB. I have a few 65% keyboards already, but they just never fit well with me. I love the idea of a 65% keyboard. I’m anxious to see if this is the one.
We’ll be using silent tactile switches. This means you can feel a little bump just after you press down, but there isn’t a super loud clicky noise after the press.
List of Parts:
- Lucky Jade Keycaps
- Tada68 65% Case
- Tada68 PCB
- Aliaz Silent Tactile Switch / 60g
- Novelkeys x Kailh Box Heavy Switches, Burnt Orange
You’ll notice I have two different sets of switches listed. I like to use a different switch for the outside keys. It gives a slightly different feel for those keys. I don’t know, maybe its a little weird, but I like it so 🤷♂.
Keyboard Build Preparation
The very first thing I do before a build is probably the most obvious: make sure I have all the parts! There are quite a few parts that make up a mechanical keyboard, and frequently come from multiple sources. So, before you build, make sure everything is accounted for!
Note: I’ve recently started using a spreadsheet to help with this. It’s made planning and tracking parts for future builds a breeze!
Testing PCB
Now that we have everything, the next most important step is to test the PCB. There isn’t much sense continuing if the PCB is fried or unusable.
To test the PCB, I use a wonderful tool from the folks at QMK called the QMK Configurator. Wait, how do we test the PCB without keycaps…
A tweezer!
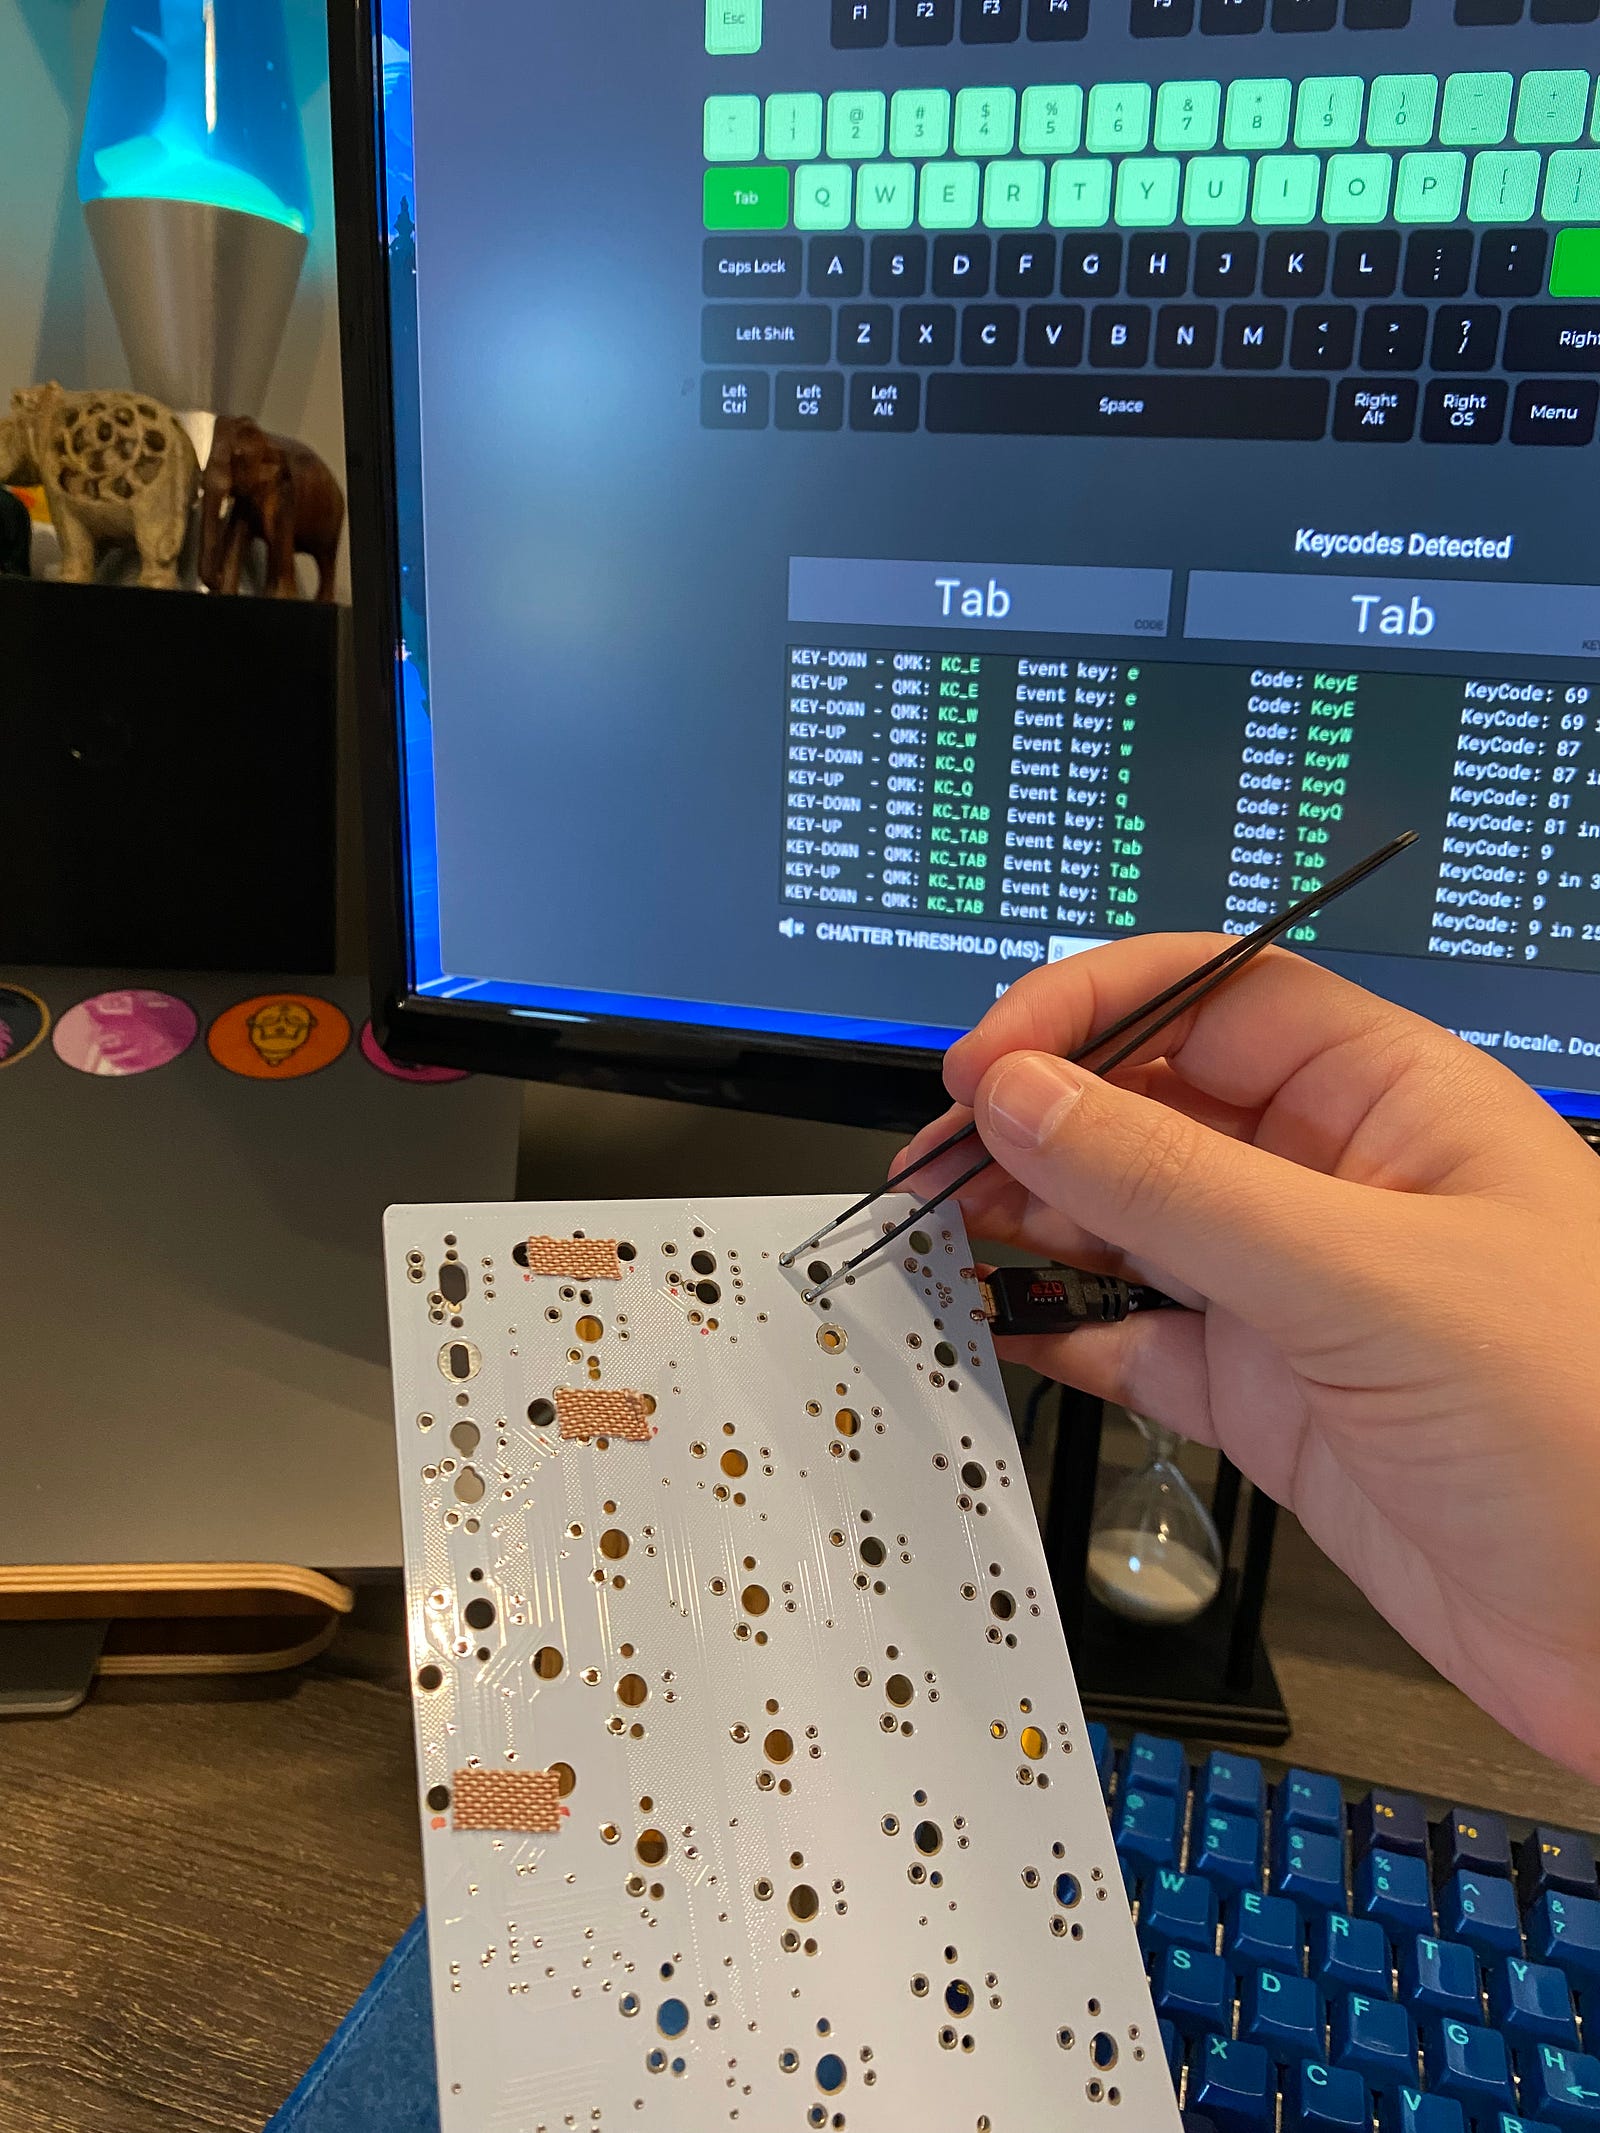 Testing PCB contacts with a tweezer and the QMK Configurator
What is actually happening here is the same thing that happens when you press down on a keycap. The electrical circuit is completed, its like flipping a light switch on or off.
Using a tweezer and the configurator we can easily see if all the switches are working. With this particular PCB, they were not. There was one set of contacts that would not respond. Upon further inspection, it looked like two sets of contacts were running into each other. Thankfully, this was what would normally be the right hand Alt key. I rarely use this key, so I decided to continue with the build.
Assembly — Stabilizers
Clip and Grease
Large keys need stabilizers. In order to make those larger keys work smoothly, respond (or recoil) quickly, and not make too much noise, there are a few things we must do:
Clip, Lube and Bandaid the stabilizers.

 Clip. Lube and Bandaid stabilizers
I should mention, these are plate mounted stabilizers. Quite cheap ones at that. When I started this phase of the project I muttered to myself
“I’m going to regret using these”
And, as it turns out, I was right. I did.
Assembly — Switches, Pt. 1
This is where we start putting all the parts together. I still like to take my time at this phase, making very sure things are positioned correctly and everything is fitting together well.
Here is the method to the placement of first few switches:
- All the keys that need stabilizers
- Each corner
- One along the top row
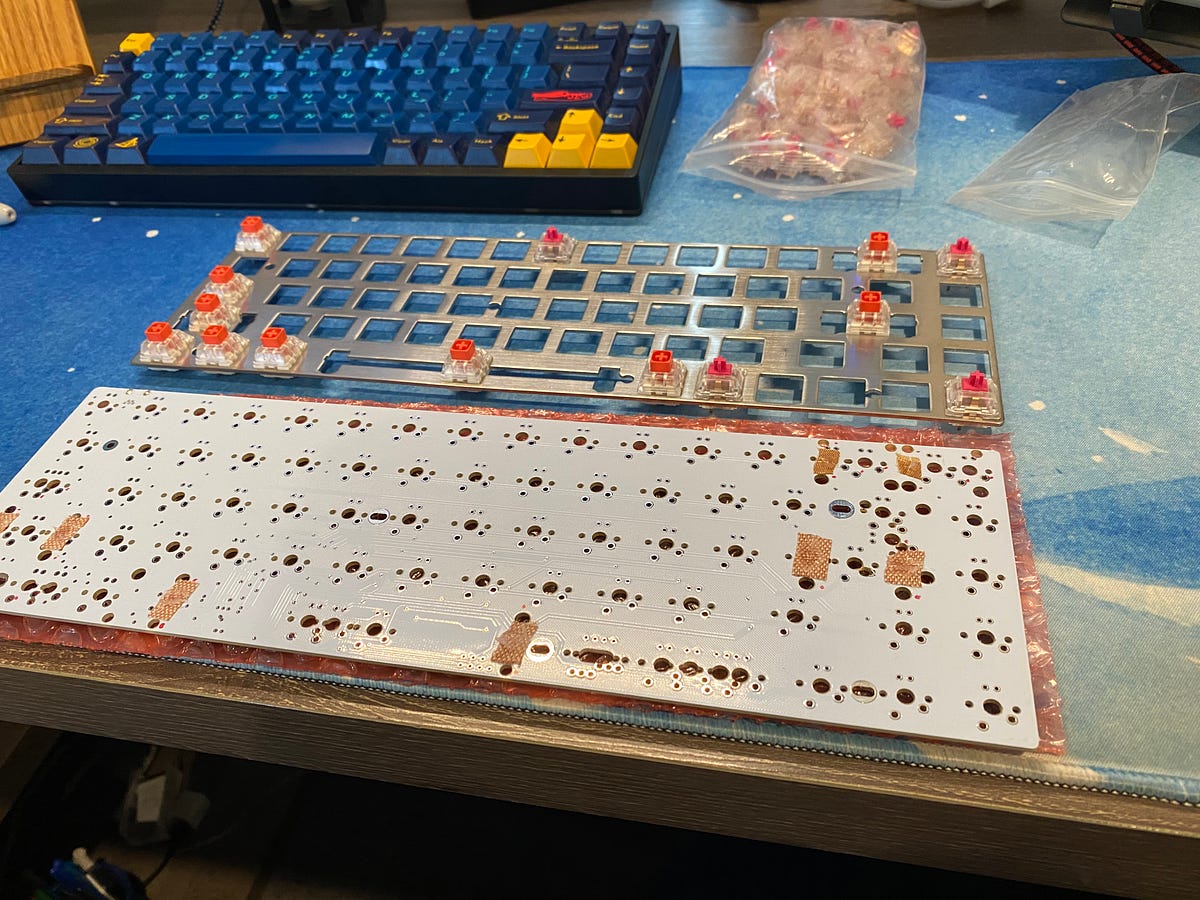
 Snapping the first few switches in the switch plate just before soldering to the PCB
The goal here isn’t to place all the switches at once. Instead, we want to get enough switches in place for the switch plate to be well secured. Once things are soldered its much more difficult to undo things.
Its good to start placing some keycaps at this phase, too, and testing things. Do the keys press? Do they recoil? Are they snappy? I wish I would have done this a little more thoroughly on this build…
Assembly — Switches, Pt. 2
Whew, we’re in the home stretch. Almost all the hard work is behind us, now it’s just a matter of placing the remaining switches and soldering them all up. This can take a little bit of time, depending on how comfortable you are with soldering. Still, its important to go slow and periodically check your work. Don’t over-solder, you want a good connection but not so much solder that you can’t see the switch stem any more or so much that it covers a neighboring contact. Conversely, don’t under-solder. You want the contact to be covered with just a little bit of the switch stem poking out of the top.
Aim for perfection here but good is all we need.
Placing switches before soldering them to a PCB
Soldering mechanical keyboard switches to a PCB
 Underside of the PCB after all the switches have been soldered
Final Assembly
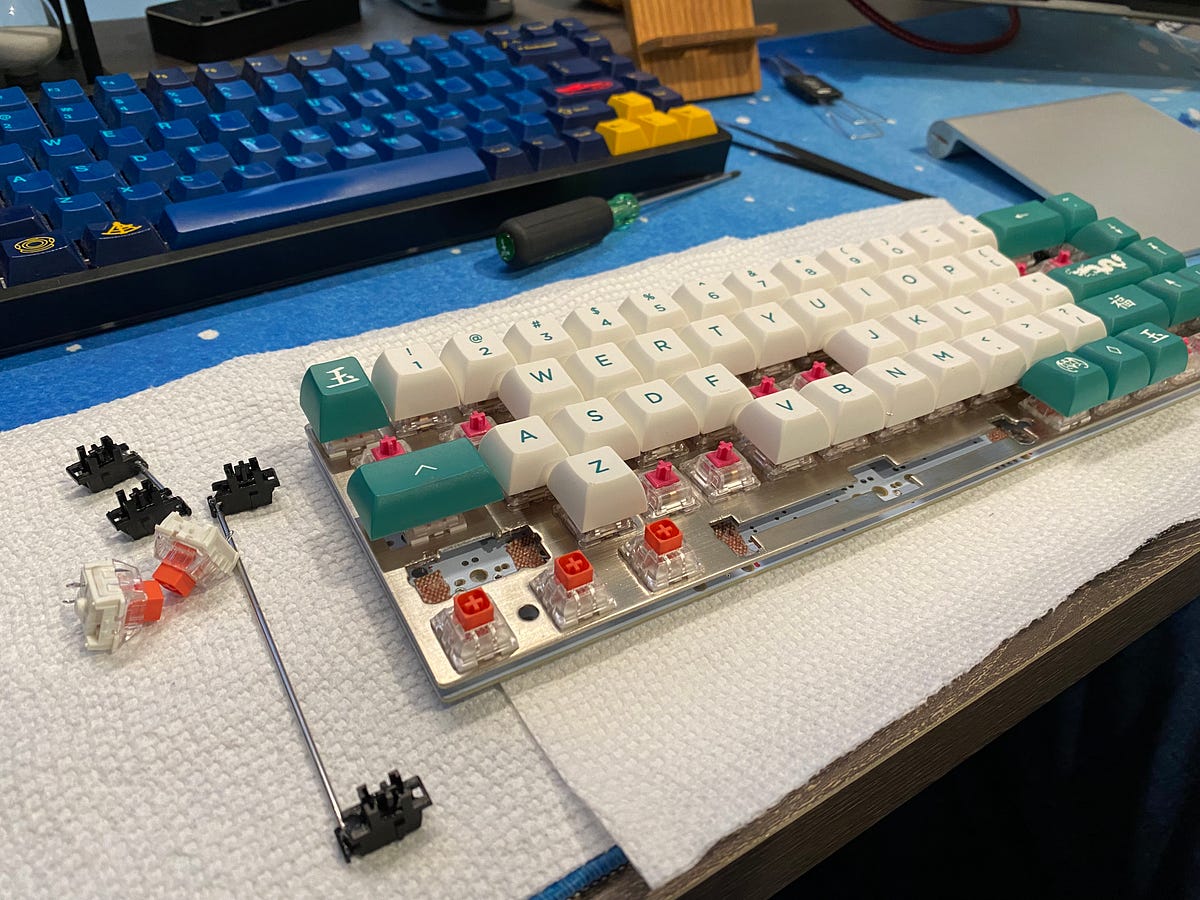
Now we place the keycaps!

 Adding keycaps to switches that have been soldered to the PCB
Depending on the keycaps, this can take almost as much time as soldering. At least for me, I tend to agonize over which keycap to use for each system key. Keep in mind, also, that these might change once we finalize the keymap.
Secure the PCB
After the switches have been soldered and the keycaps secured (or at least selected), it’s time to secure the PCB to the case. For this build, there were six tiny screws that needed to be fastened.
This is a little more delicate that it first seems. The screws are small and there is this lovely gap between the PCB and the switch plate. Its very easy to get a screw off vertical and suddenly stuck between the PCB and switch plate.
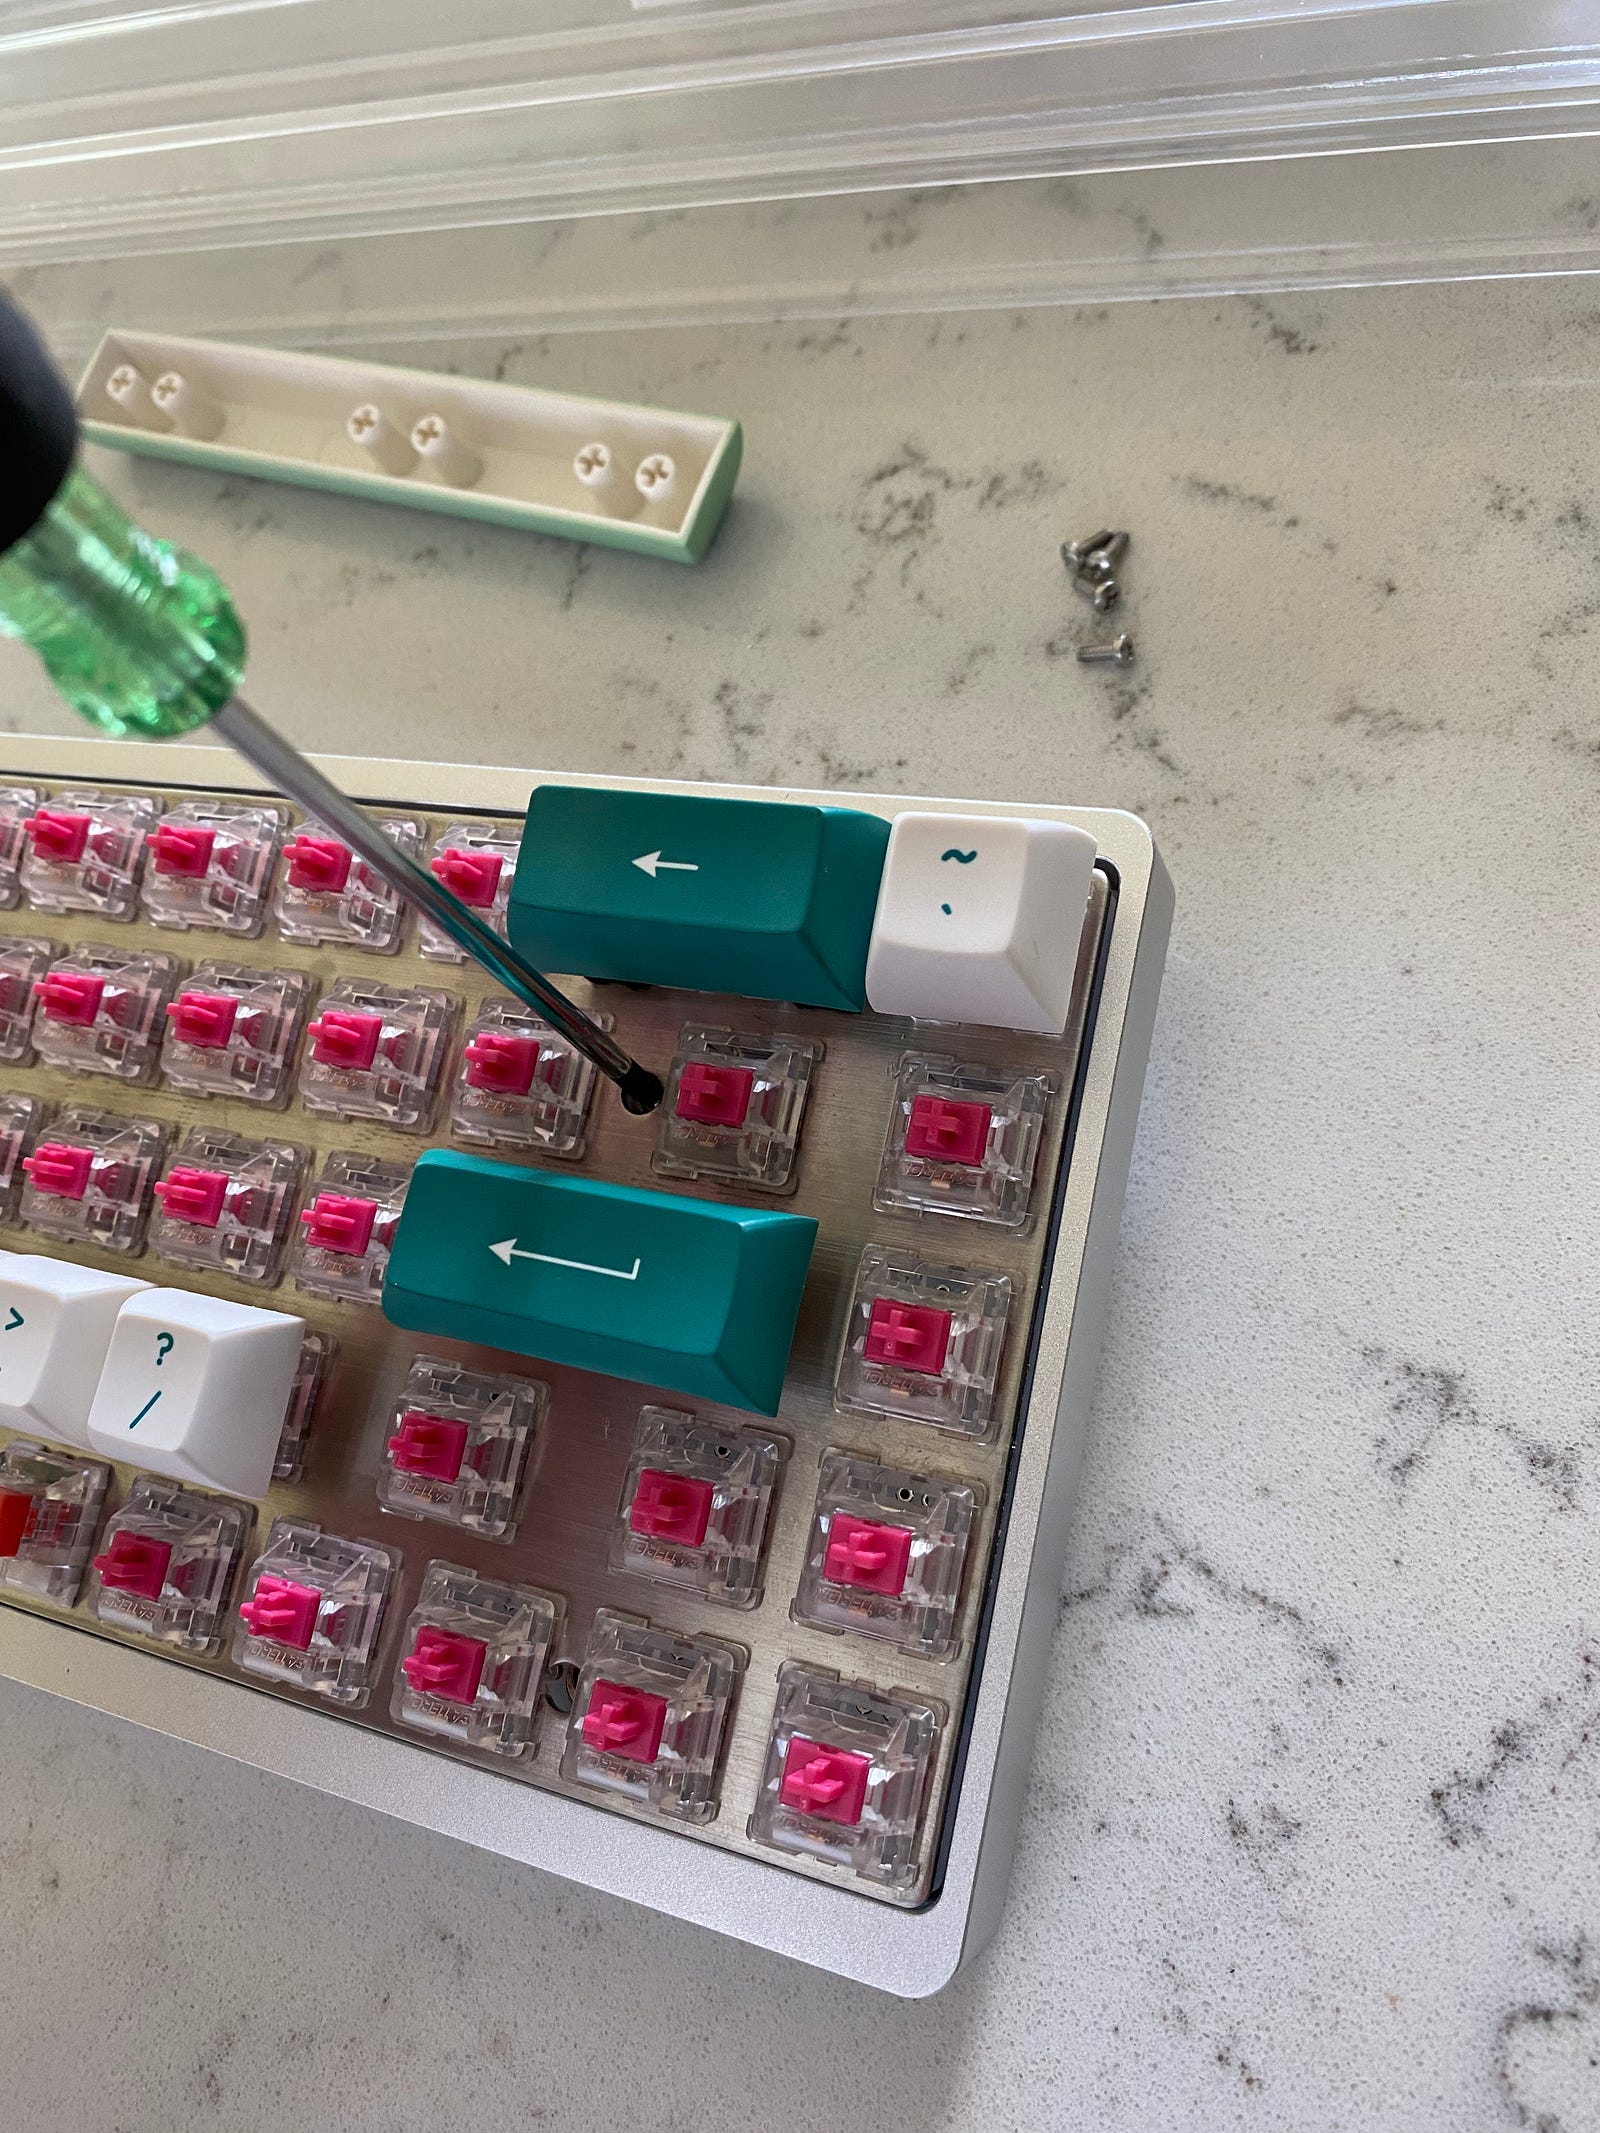 Fastening the PCB to the case via mounting screws
Whoops, I Made a Mistake!
It wasn’t until this phase of the project that I realized I made a boo-boo. I put dielectric grease around the inside of two of the stabilizer housings. Admittedly, this was a rookie mistake. Putting grease here had the opposite effect; it made the stabilizers stick. This means that two keys would not recoil after being pressed.
Thankfully, this is a solvable problem. It did require an extra amount of work though and was more than a little a pain in the a**.
Here are the steps for getting this bug resolved:
- Pull out around 10 keycaps to get to each mounting screw
- Un-mount PCB from case
- De-solder the two switches with affected stabilizers
- Remove sticky stabilizers
- Clean grease out of sticky stabilizers.
- Re-attach stabilizers
- Re-solder removed switches
- Test fix (it worked!)
- Re-attach PCB to case
- Place removed keycaps back on their switches

 Detached PCB and switch plate with offending stabilizers removed, and corresponding switches de-soldered
Flashing
With everything back together and working, now we type! I’m a fan of a website called Monkeytype for this because its fast, clean, and easy to use. What we are looking for here is feel and function: Does it feel correct? Does it feel nice to type on? Does it work the way our hands expect? This is also where I start making mental notes about the keymap and what I might change.
Changing the keymap for this keyboard is going to be done with the help of, again, the good people at QMK. We’ll be using the QMK Configurator for this, too.

Out of the box, the Tada68 comes with a pretty standard 2-layer 65% keymap.


I’m a little bit particular with my keymaps, so I tend to tinker with them a little bit. In the end, I ended up flashing this board 5 or 6 times until I was able to get things just the way I like it.
Here is what I ended up with:
 Finished Lucky Jade + Tada68 mechanical keyboard keymap
Completed Lucky Jade Build

This was a fun build and was a long time coming, too. Some of the parts for this build were purchased 16 months ago, way back in February of 2020 (like, a lifetime ago!).
Overall the build went fairly well. There were some bumps along the way, sure, but we made it through and ended the day with a pretty great feeling (and looking) mechanical keyboard.
References
- https://aziocorp.com/blogs/blog/get-to-know-your-keyboard-the-3-types-of-mechanical-switches
- https://dygma.com/blogs/stories/the-ultimate-guide-to-mechanical-keyboard-switches-for-2020
- https://www.crackedthecode.co/a-complete-guide-to-building-a-hand-wired-keyboard/
- https://matt3o.com/hand-wiring-a-custom-keyboard/
- https://www.reddit.com/r/MechanicalKeyboards/comments/n1sq5k/keyboard_size_guide/
- https://config.qmk.fm/#/test
- https://www.youtube.com/watch?v=cD5Zj-ZgMLA
- https://monkeytype.com/
- https://config.qmk.fm/#/tada68/LAYOUT_65_ansi
Parts